Table of Contents:
Intro
TL;DR: I built a custom mechanical keyboard that can be used as an all-in-one computer or just a regular keyboard. Raspberry Pi 400 + Tada68 = Raspberry Pi 468.
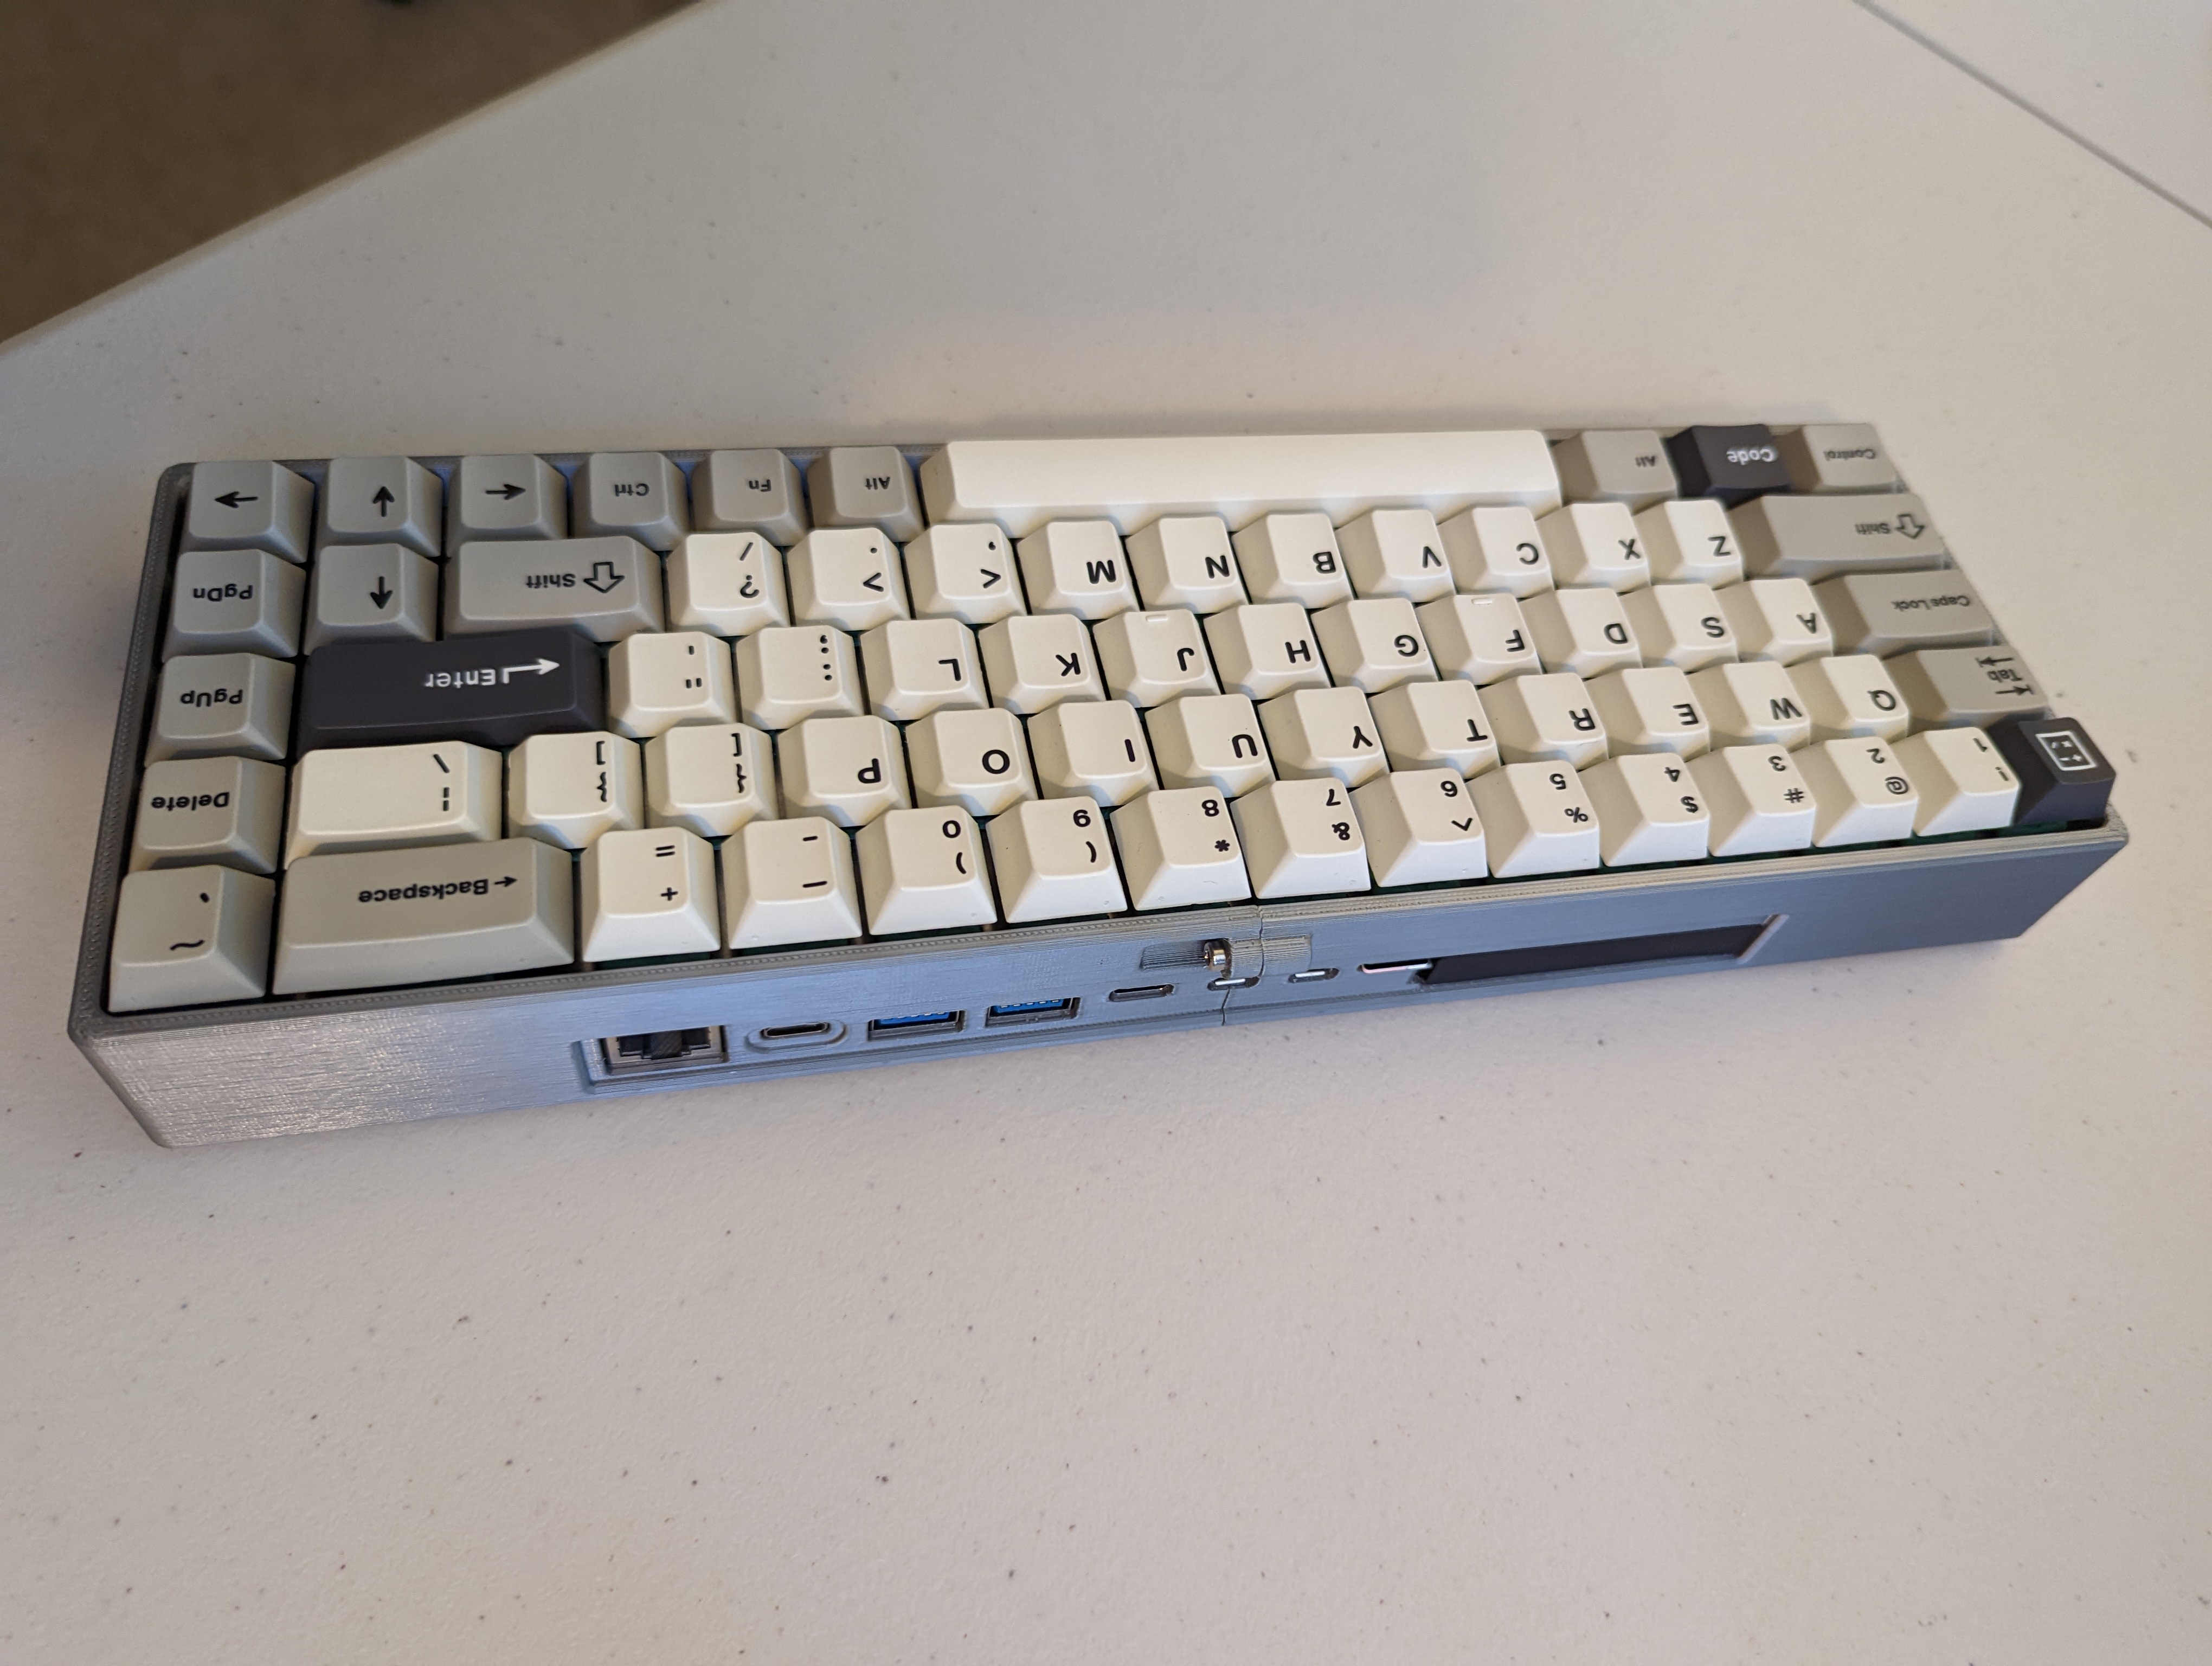
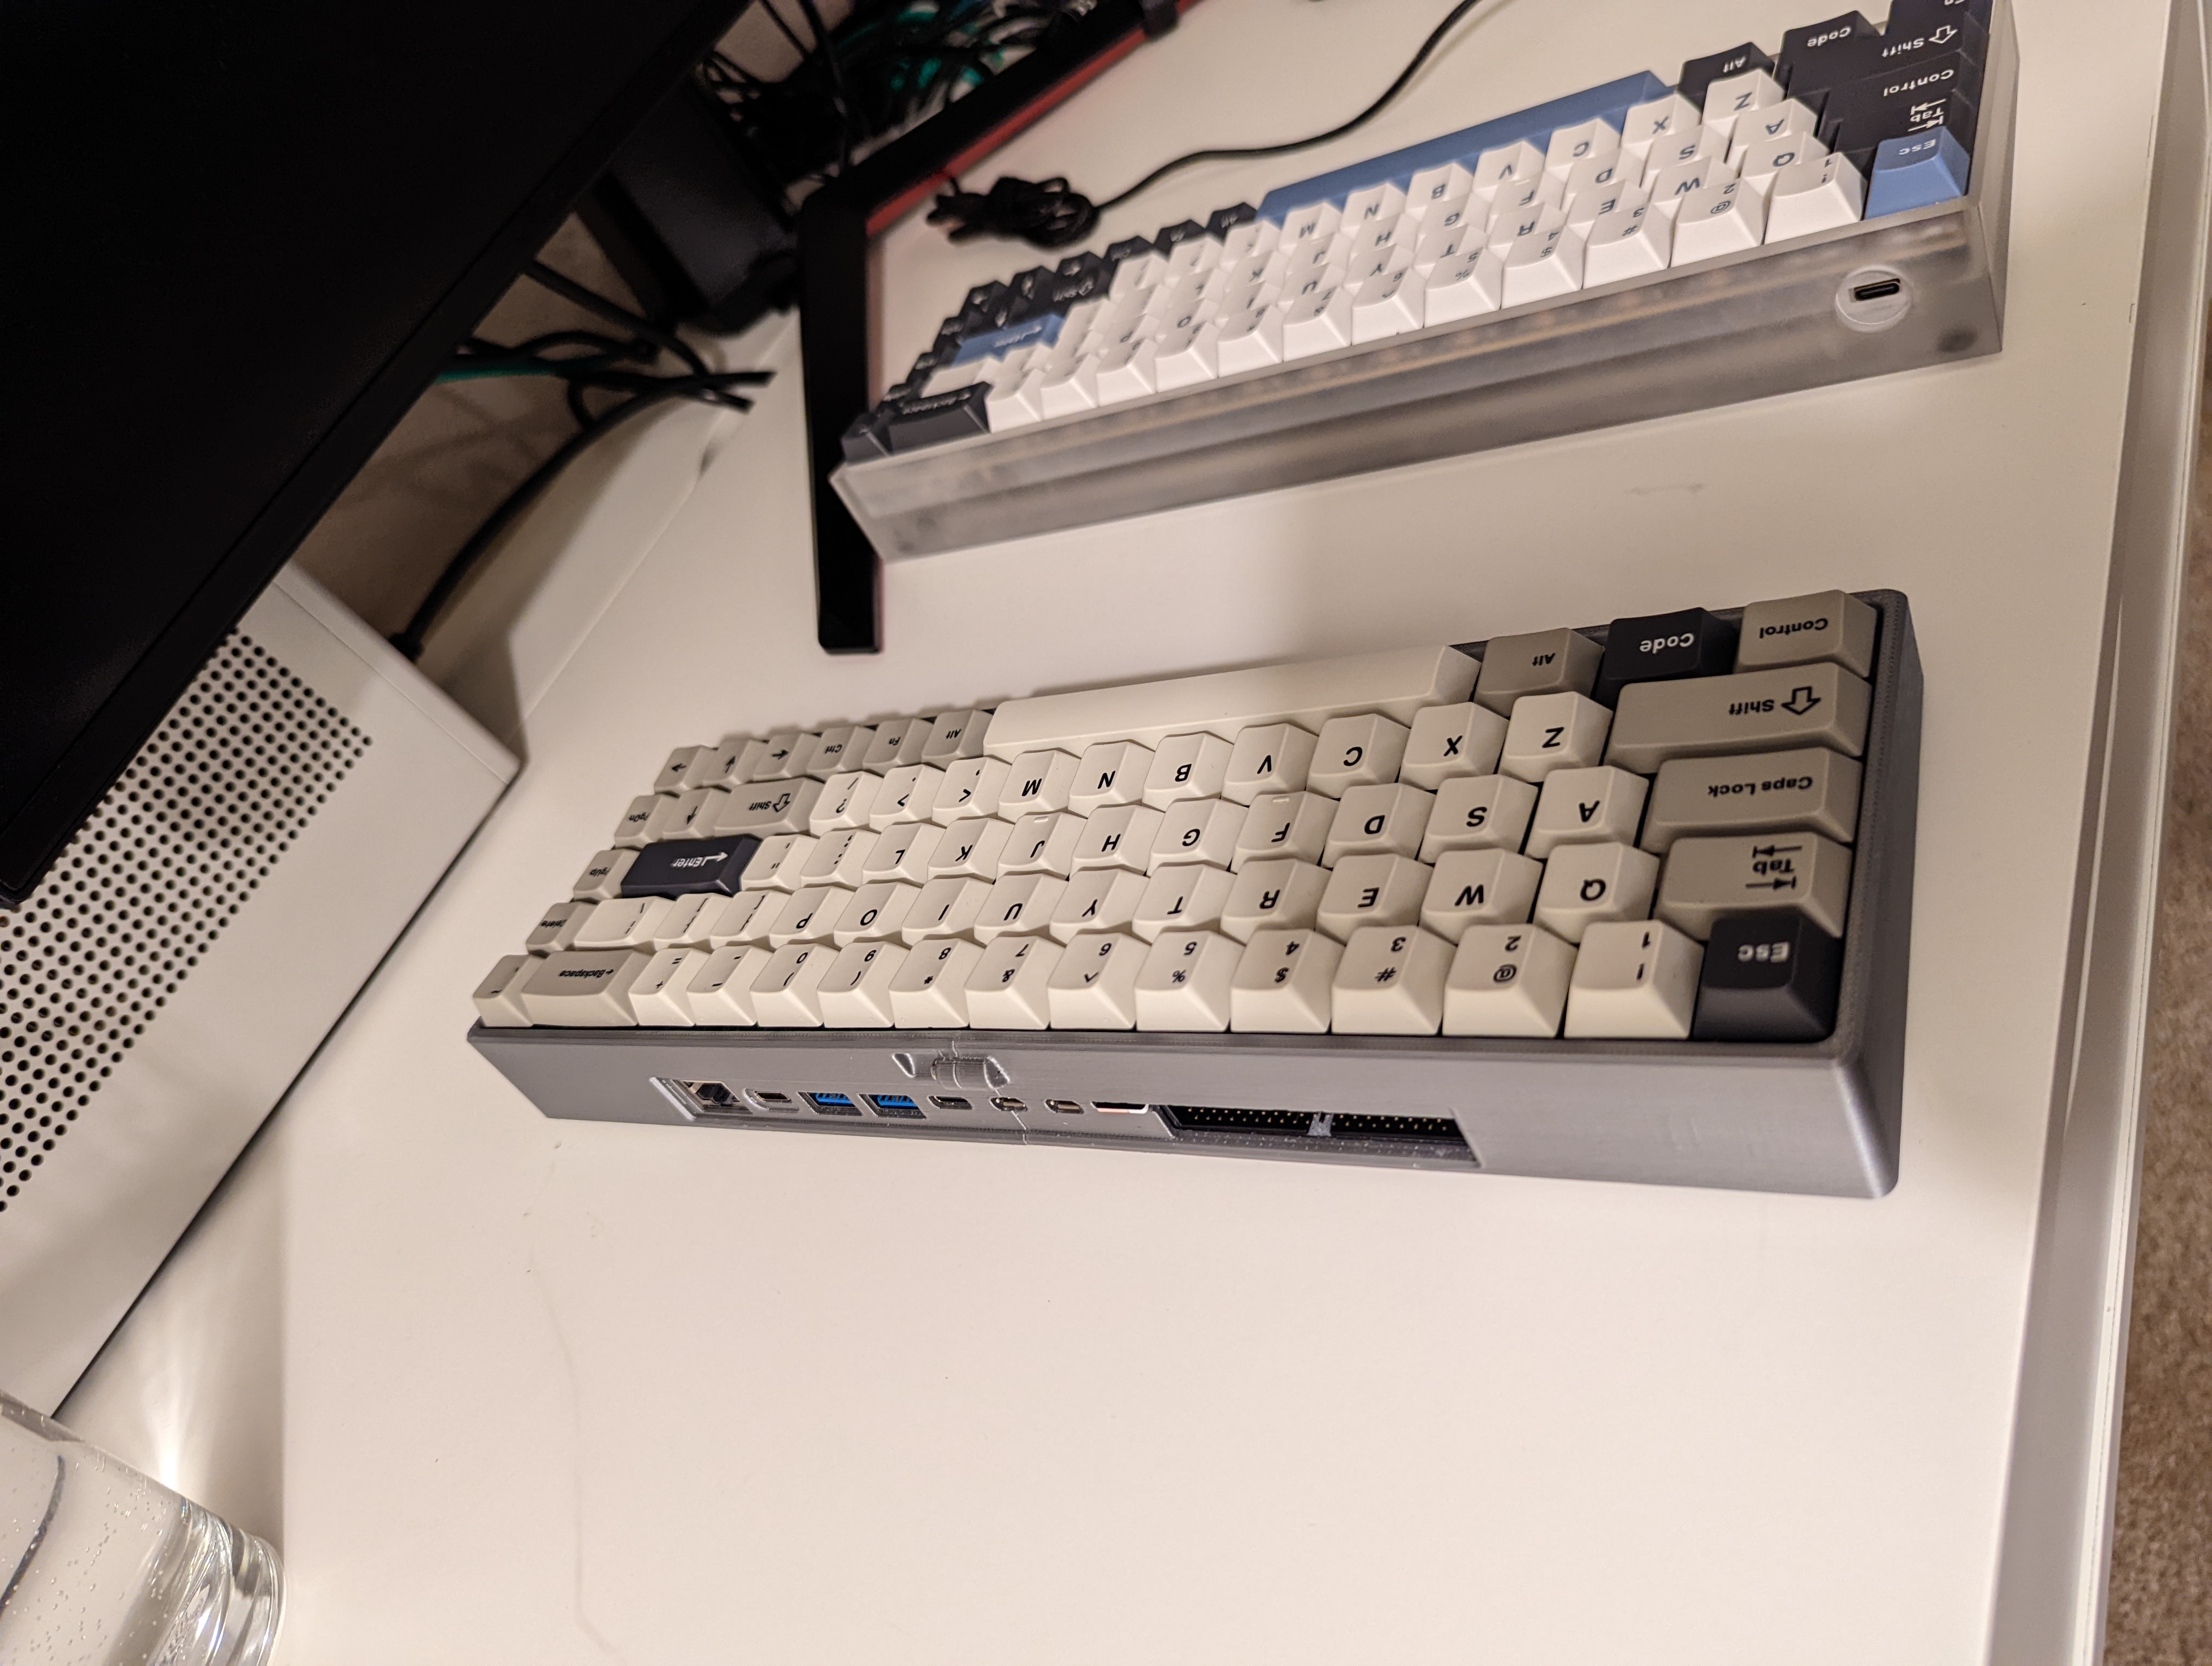
Completed Raspberry Pi 468 with built in USB host switching circuit, printed in PLA.
I’m someone who appreciates a tactile keyboard experience. When keystrokes have a positive, discrete feel, it provides a passive confirmation to my hands that my keypresses have had the intended effect. This makes typing and writing code both more efficient and more enjoyable.
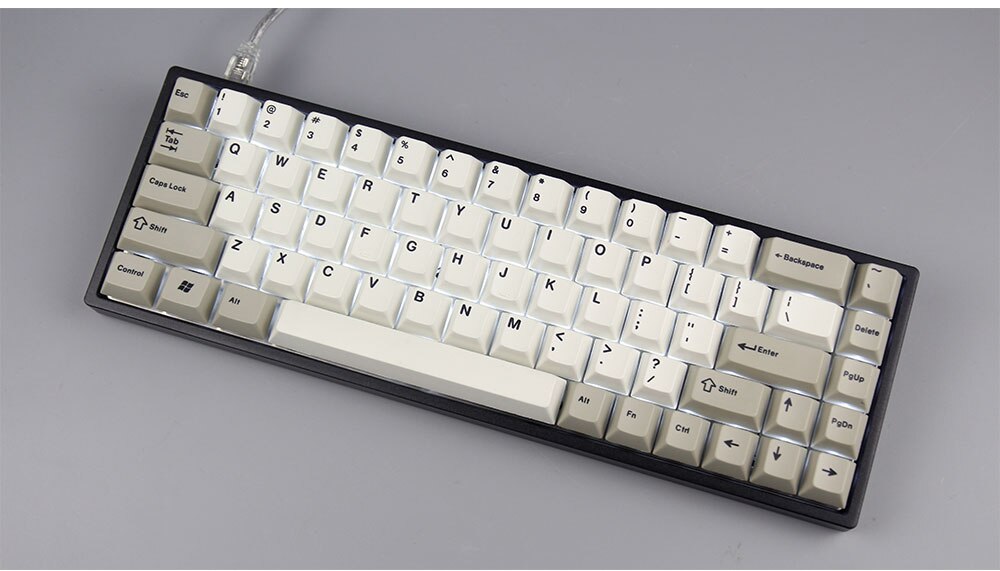
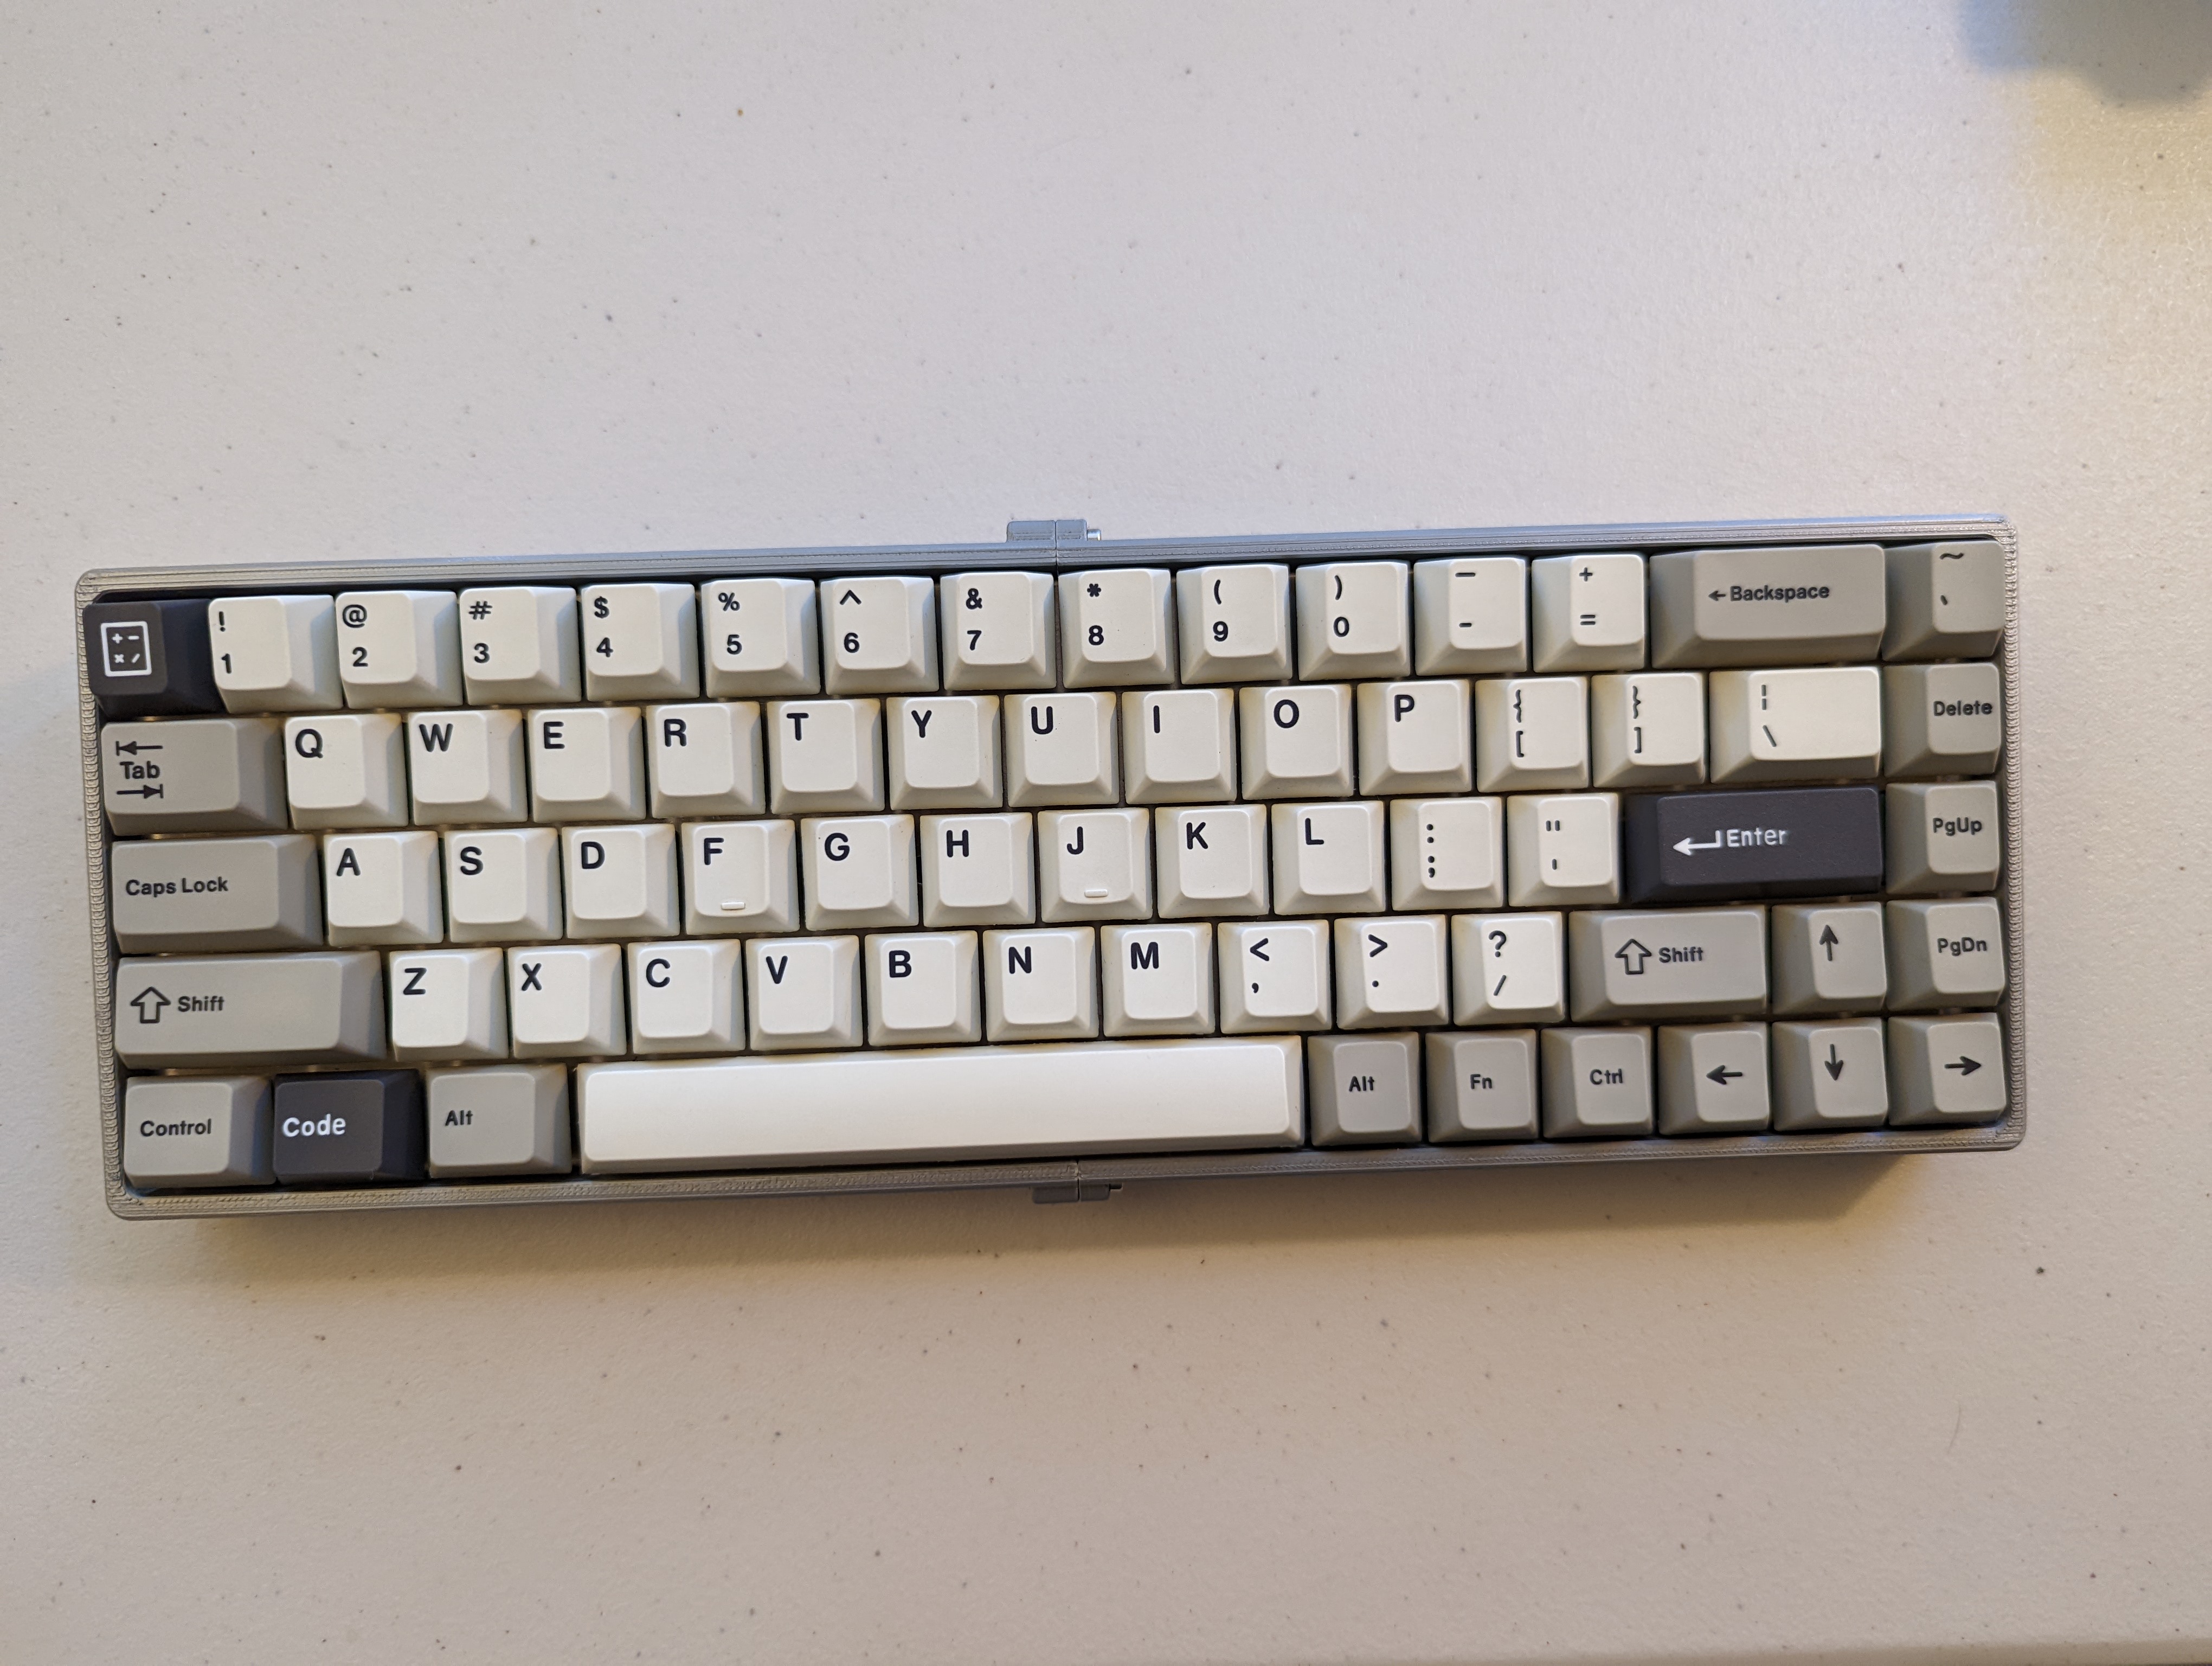
The Tada68 mechanical keyboard, named for its 68 keys (source).
I’m also someone who loves the ethos around the Raspberry Pi single board computer – a small, inexpensive computer put into the hands of as many people as possible. As well as their iconic credit card sized form factor, the company behind Raspberry Pi also made the Raspberry Pi 400. The ‘Pi 400’ is a fully featured Raspberry Pi built into a slim keyboard, featuring most of the IO ports of the ‘B+’ form factor. The utility density of the Pi 400 was something I just had to have.

The official Raspberry Pi 400 keyboard computer (source).
After a somewhat impulsive purchase from my local Micro Center, I went home with a Pi 400. It was both incredible and lack luster in the ways I expected: it was a bonafide Raspberry Pi computing platform with a terrible keyboard (mushy and uneven feeling, shallow key travel).
The obvious conclusion that I came to was: why not combine a tactile mechanical keyboard with the mainboard of the Pi 400? Surely there are plenty of people who have already done this. It turns it this is not so simple to do without making fairly large aesthetic and functional tradeoffs.
And so I set to work to combine my trusty (albiet aging) Tada68 mechanical keyboard with the mainboard of the Pi 400.
It was a success. Along the way I had to:
- design a custom USB host switching circuit
- design a sturdy custom case that I could print and assemble at home
- do some ugly soldering
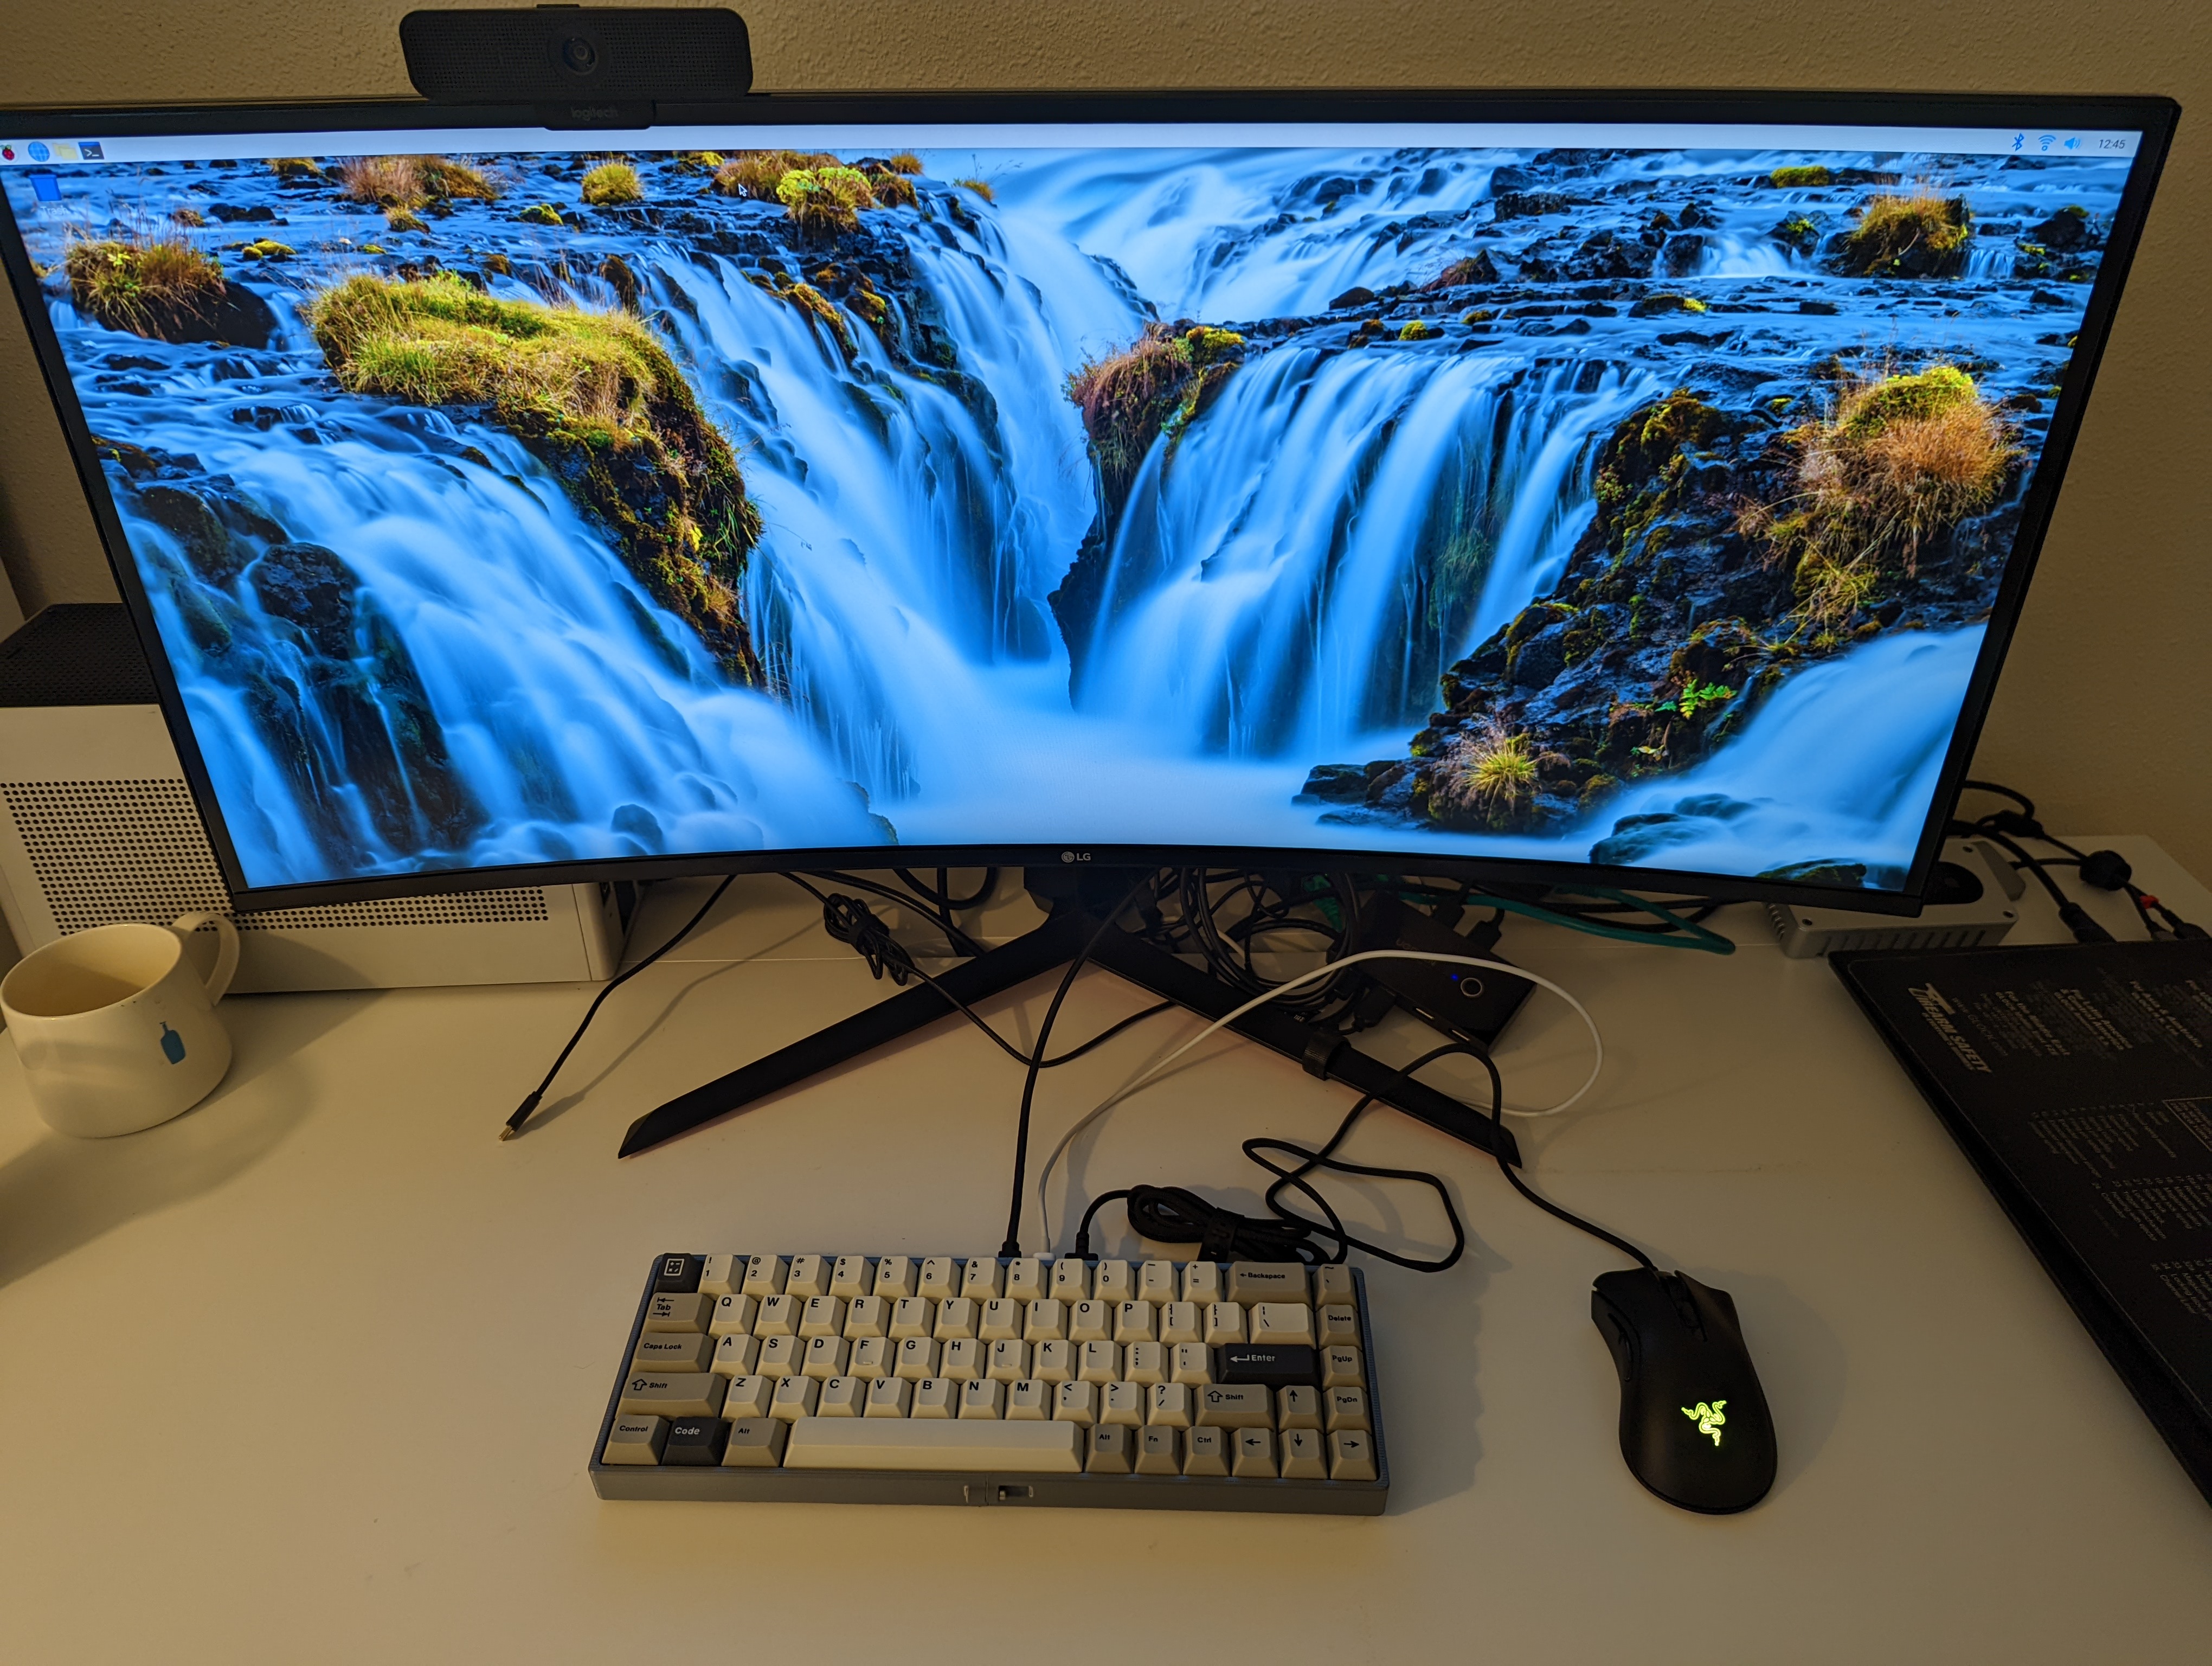
Running Raspberry Pi OS on the RPi 468 in ‘keyboard computer’ mode at my desk.
Design
The major design decisions I made for the RPi 468 at the outset:
- Behave as a normal keyboard for other USB hosts (e.g. desktop, laptop) whether the Pi 400 is powered on or not.
- Switching between operating modes should be implicit based on what physical connections are made, no user input required.
- Indistinguishable in appearance from a typical 65% mechanical keyboard.
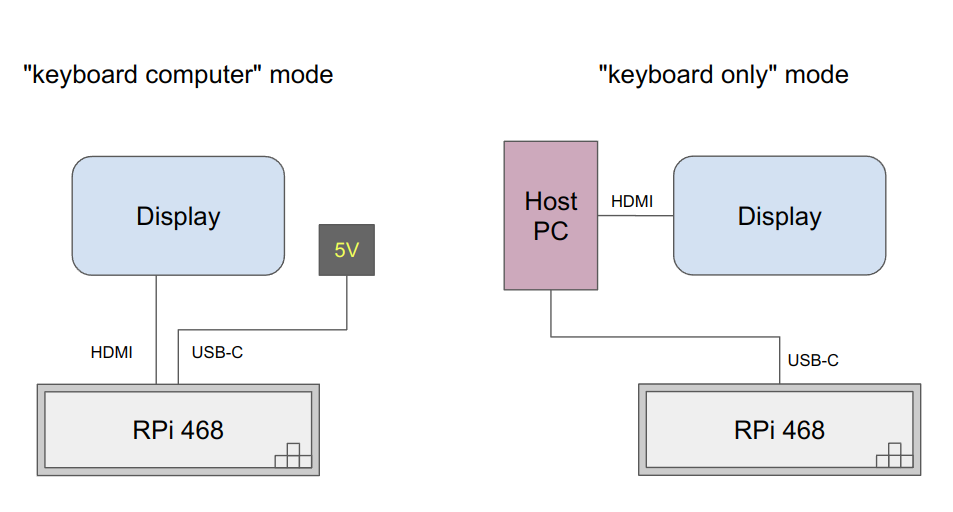
Diagram of the distinct operating modes.
I was pretty confident the mechanical design would work out given form factors of the Pi 400 mainboard and the Tada68 PCB. I started by prototyping the circuit which would meet the specifications above.
If you’re looking for design files, see the Design files section below. I don’t intend to write up any steps or tutorials.
Circuit design
The goal for my design was to have a seemless experience in operating in either ‘keyboard computer’ mode, or ‘keyboard only’ mode (for a host PC). To achieve this and also eliminate a USB-A cable loop outside of the case, I needed a USB host switching circuit board. After some research, I realized this circuit board did not exist in the form factor I needed, and I’d have to design and build a custom one.
Here’s a summary of what the circuit does:
- Soldered directly into a depopulated USB-A 2.0 port on the Pi 400
- It accepts a single USB-C connection
- When there is a USB-C connection, the connected device becomes the host device
- When there is not USB-C connection, the Pi 400 is the host device
With some pointers on components from my excellent colleagues Casey Goodwin and Mike Yagudayev, I selected components and made a breadboard prototype.
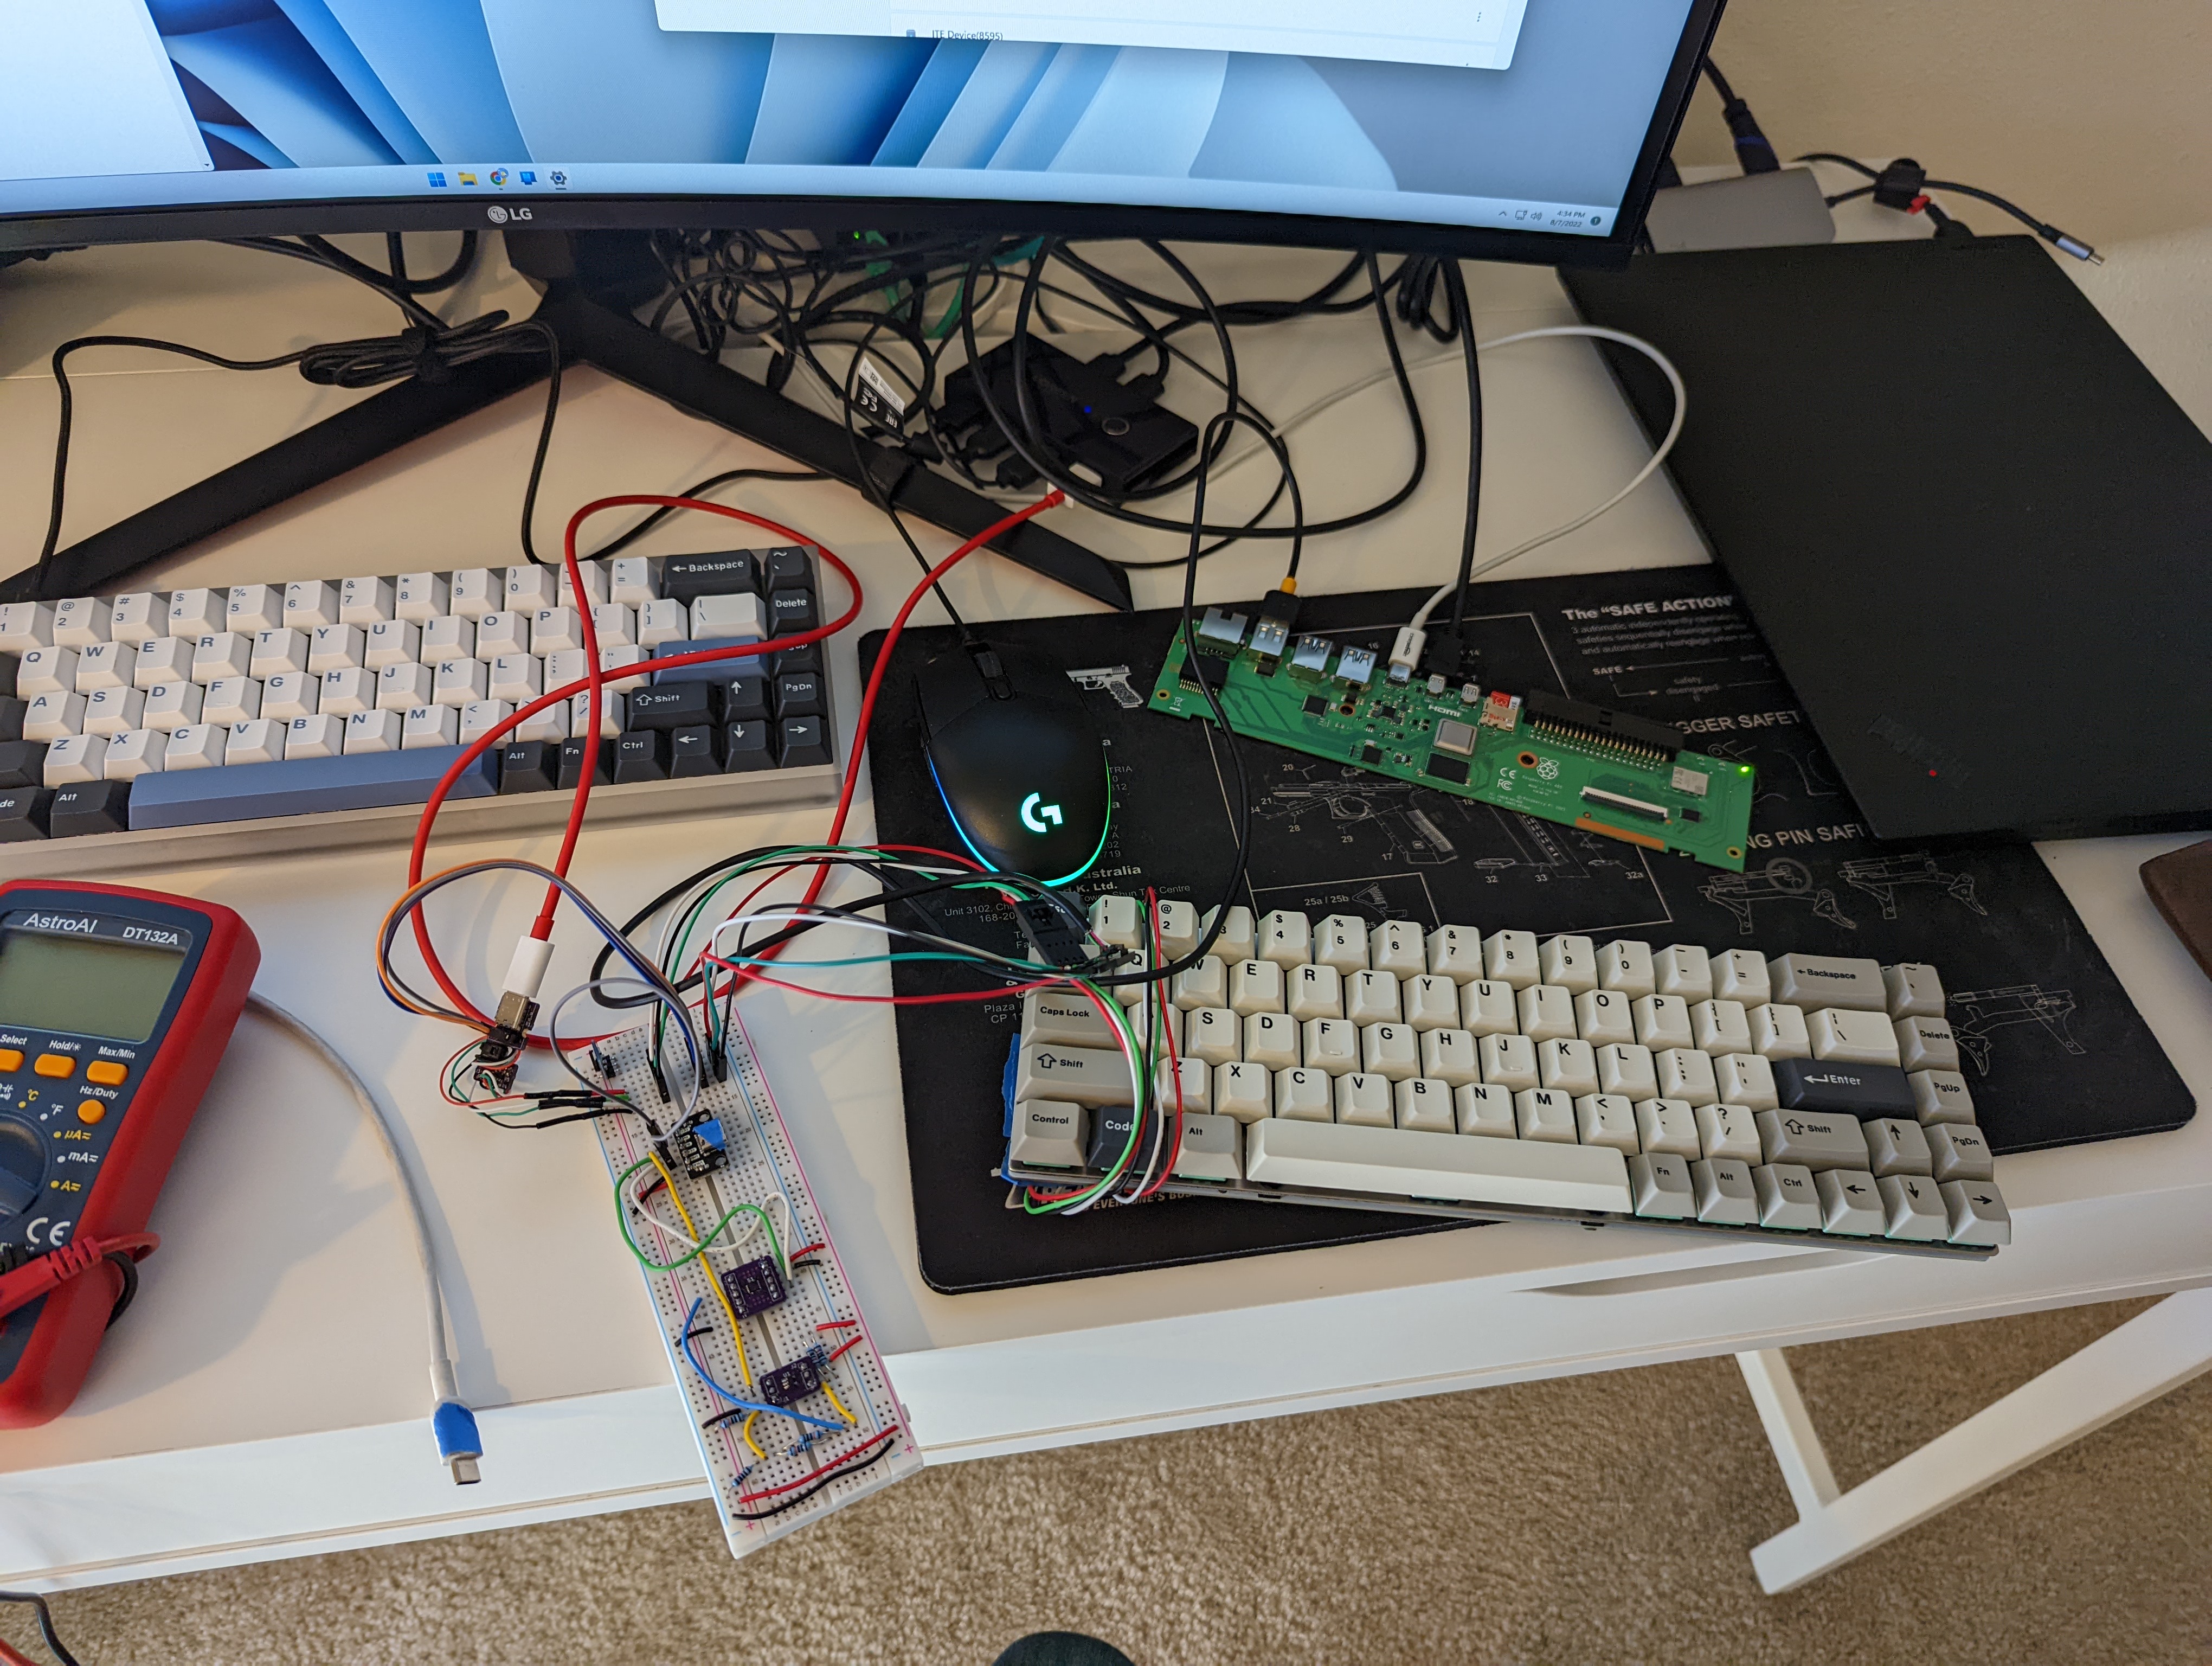
Prototype of components on breakout boards on a messy desk.
After ironing out schematic / wiring issues and confirming resistor values for the desired host switching behavior, I designed the PCB in KiCAD and had it fabricated through OSHPark. Using a stencil, hotplate, and heat gun, I reflow soldered the components to the PCB.

USB host switching circuit right after hotplate soldering.
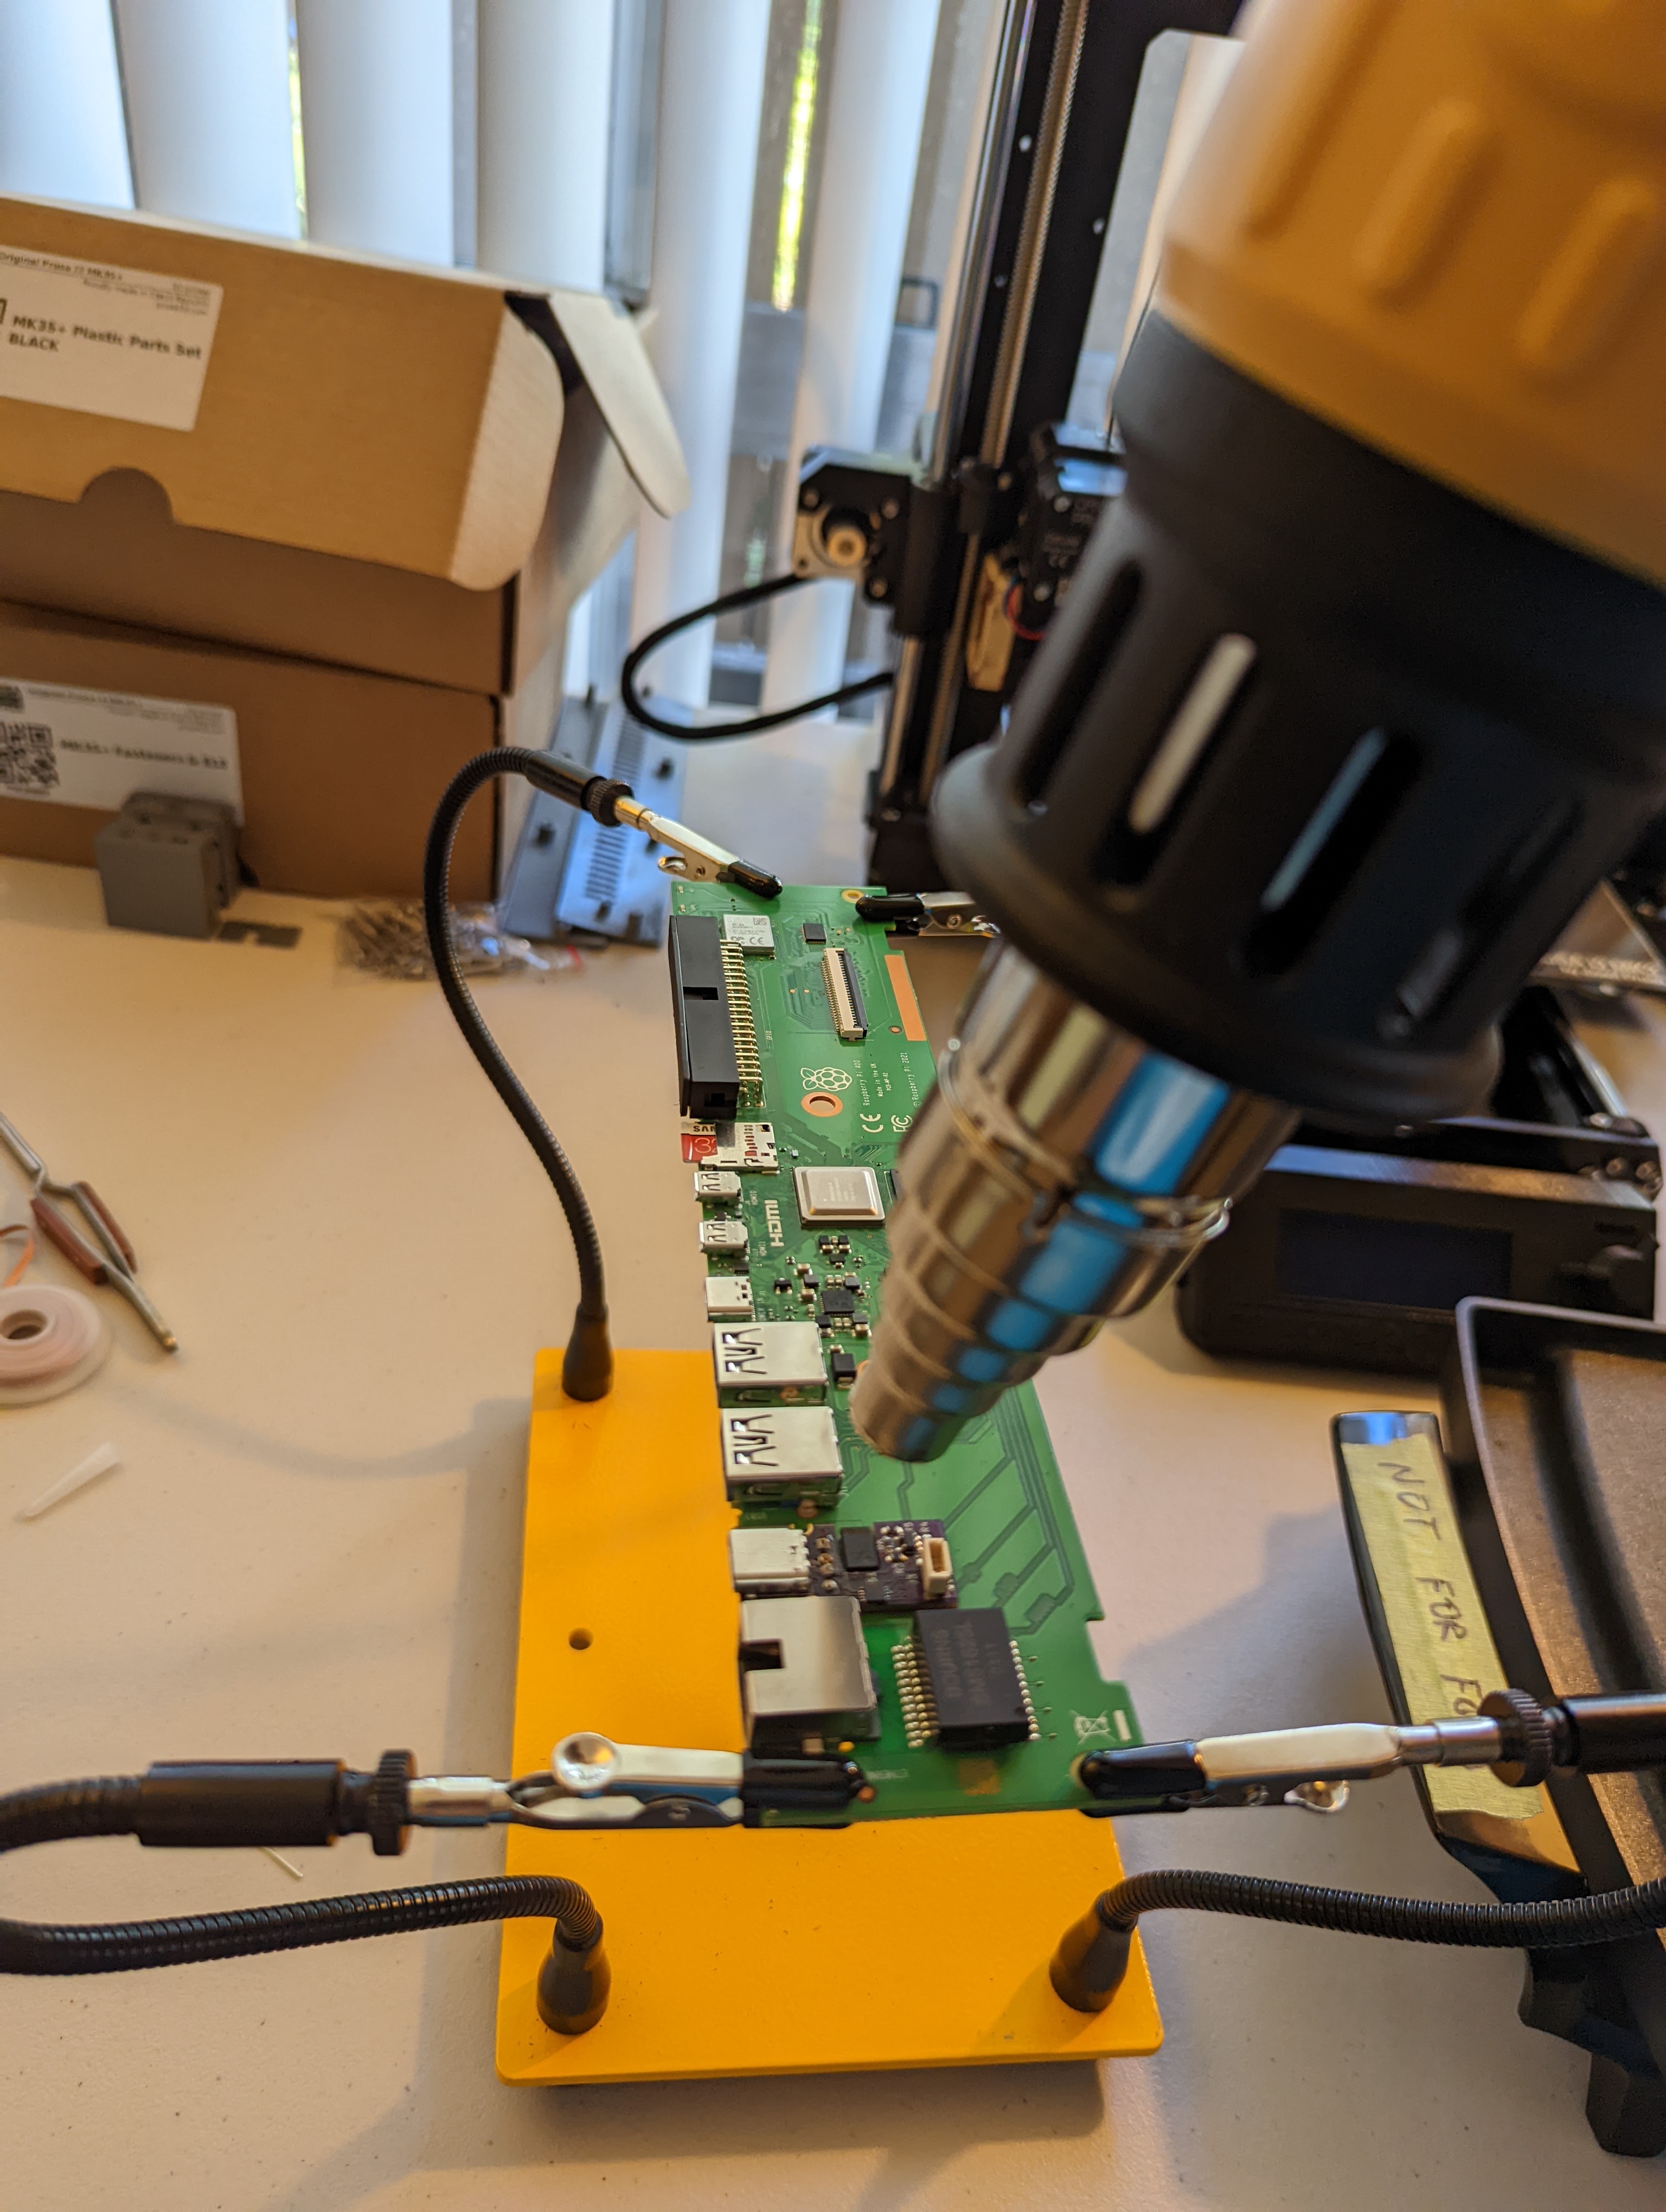
Next came the surgery of depopulating the USB ports from both the keyboard and the Pi 400 (removed it’s single USB 2.0 port). This is the part I’m least proud of, but all of the solder joints have held firm.
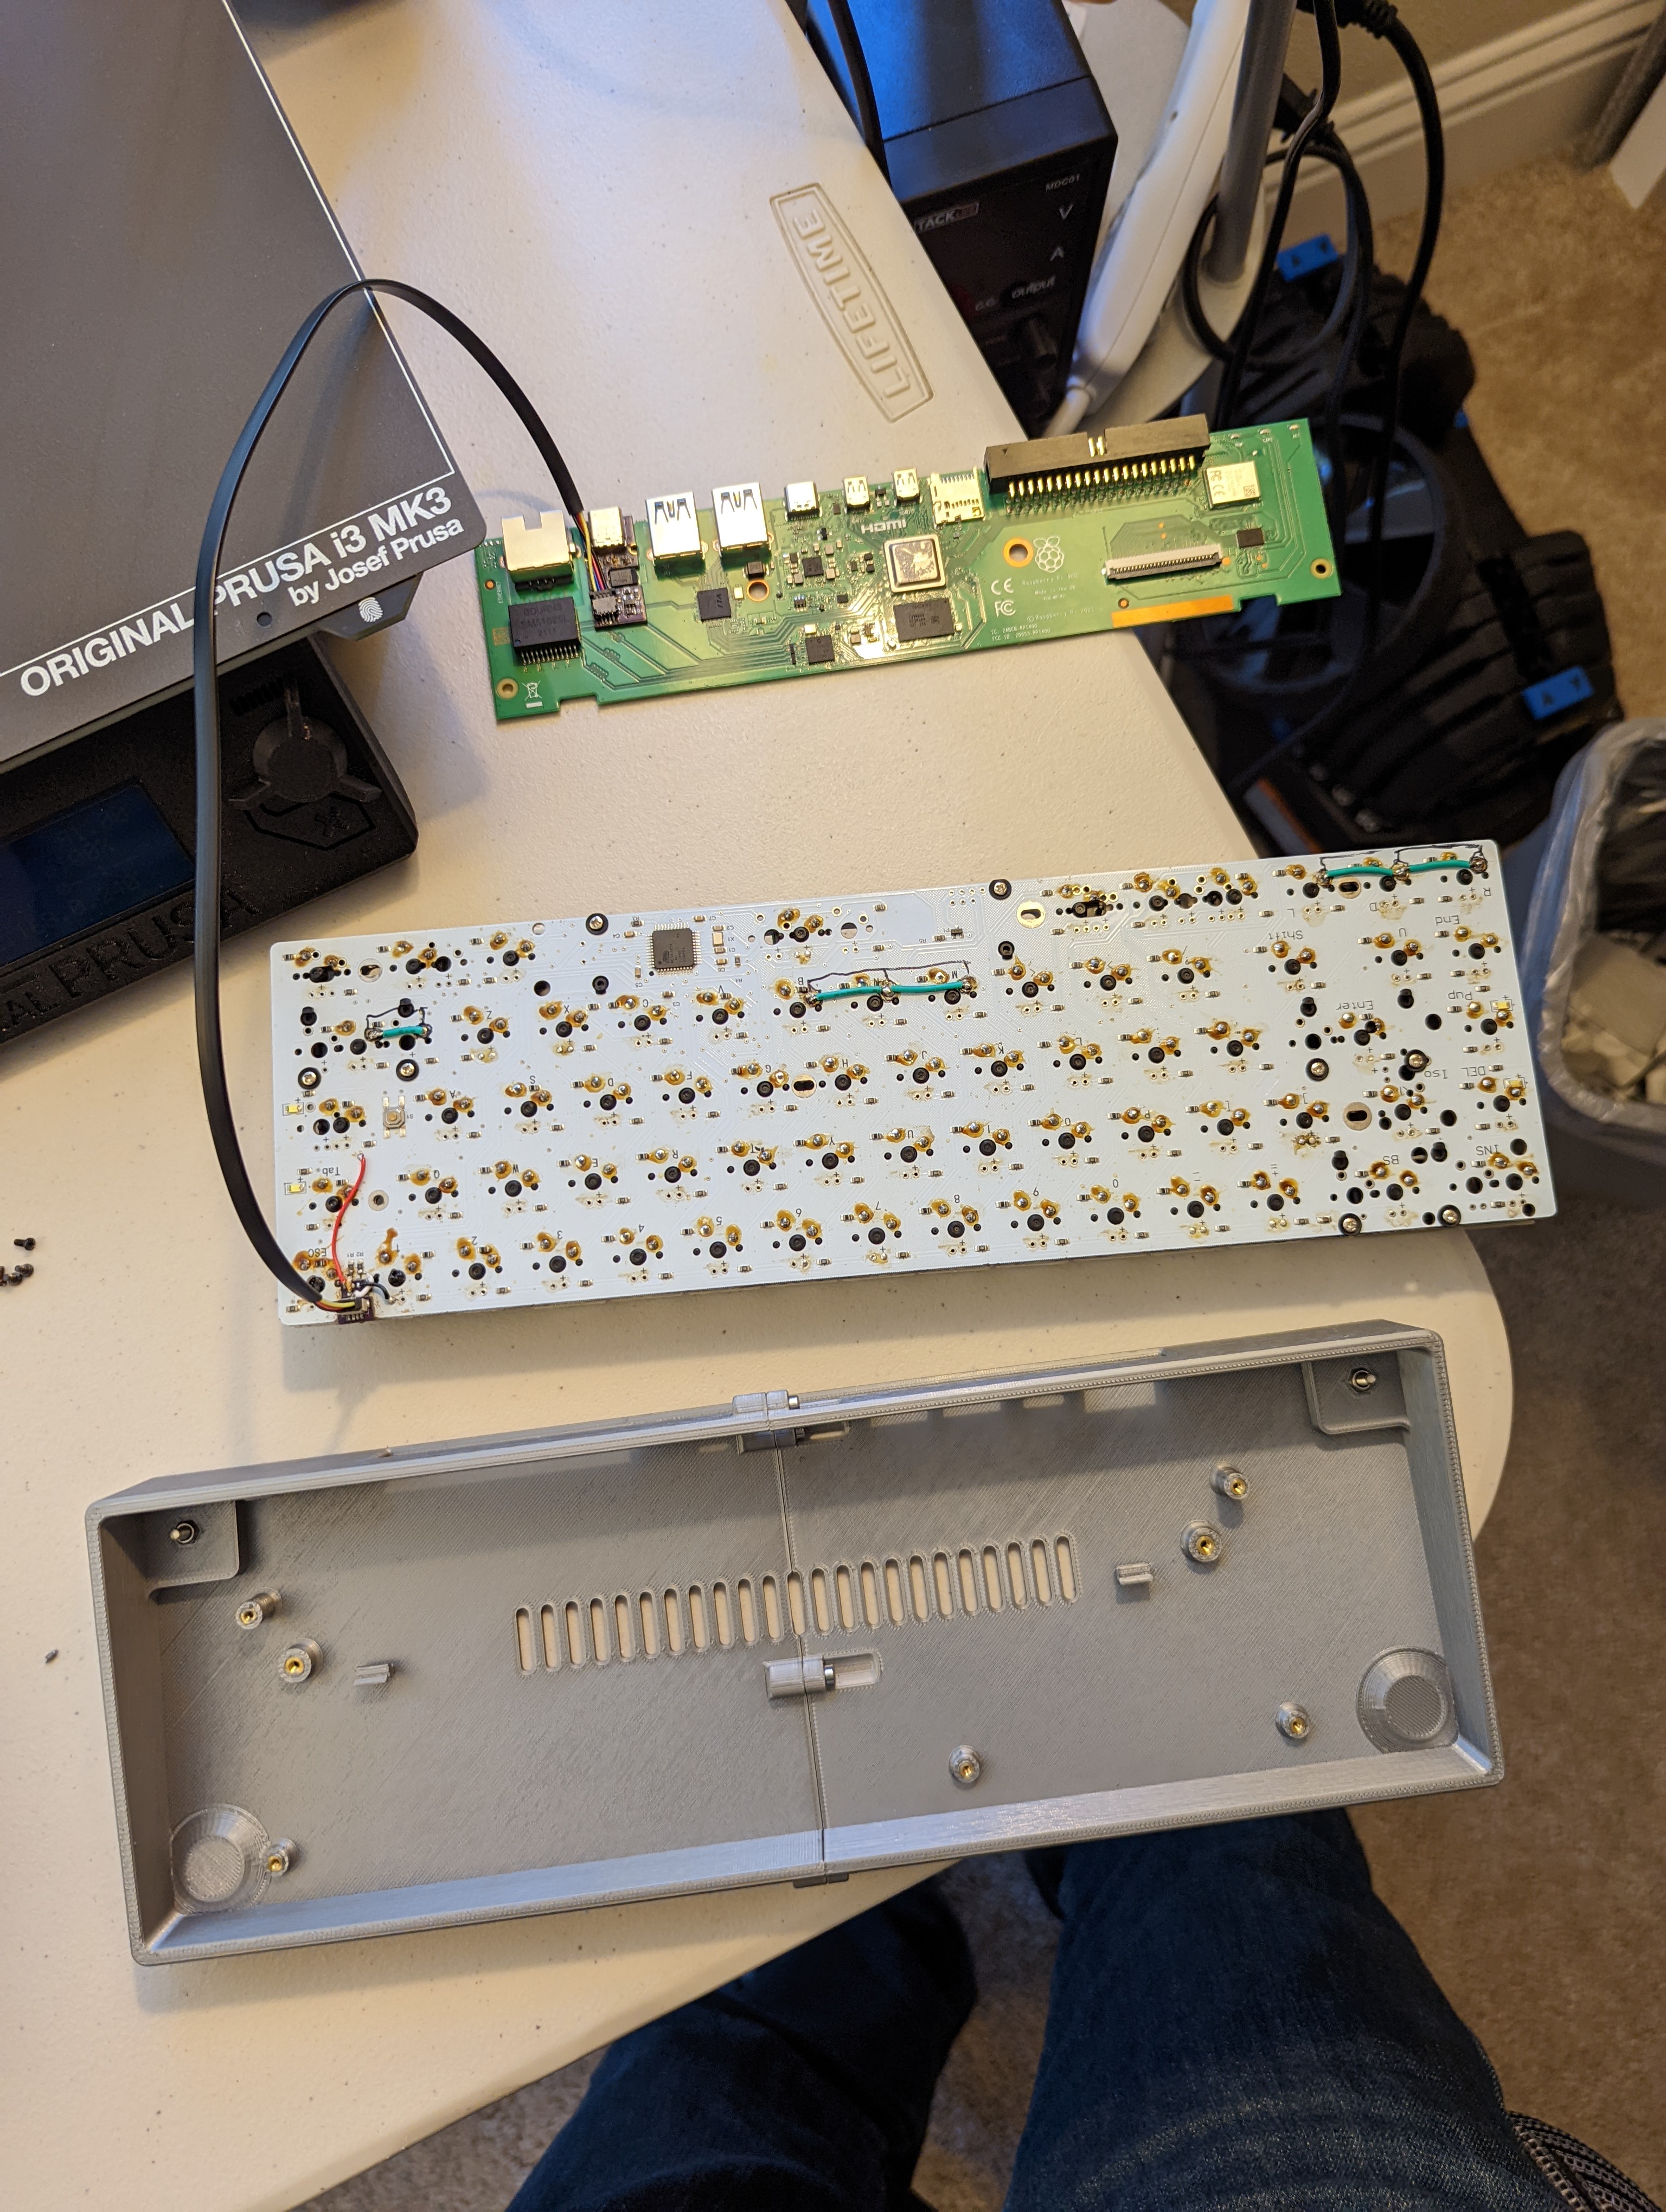
USB host switching circuit right after hotplate soldering.
Mechanical design
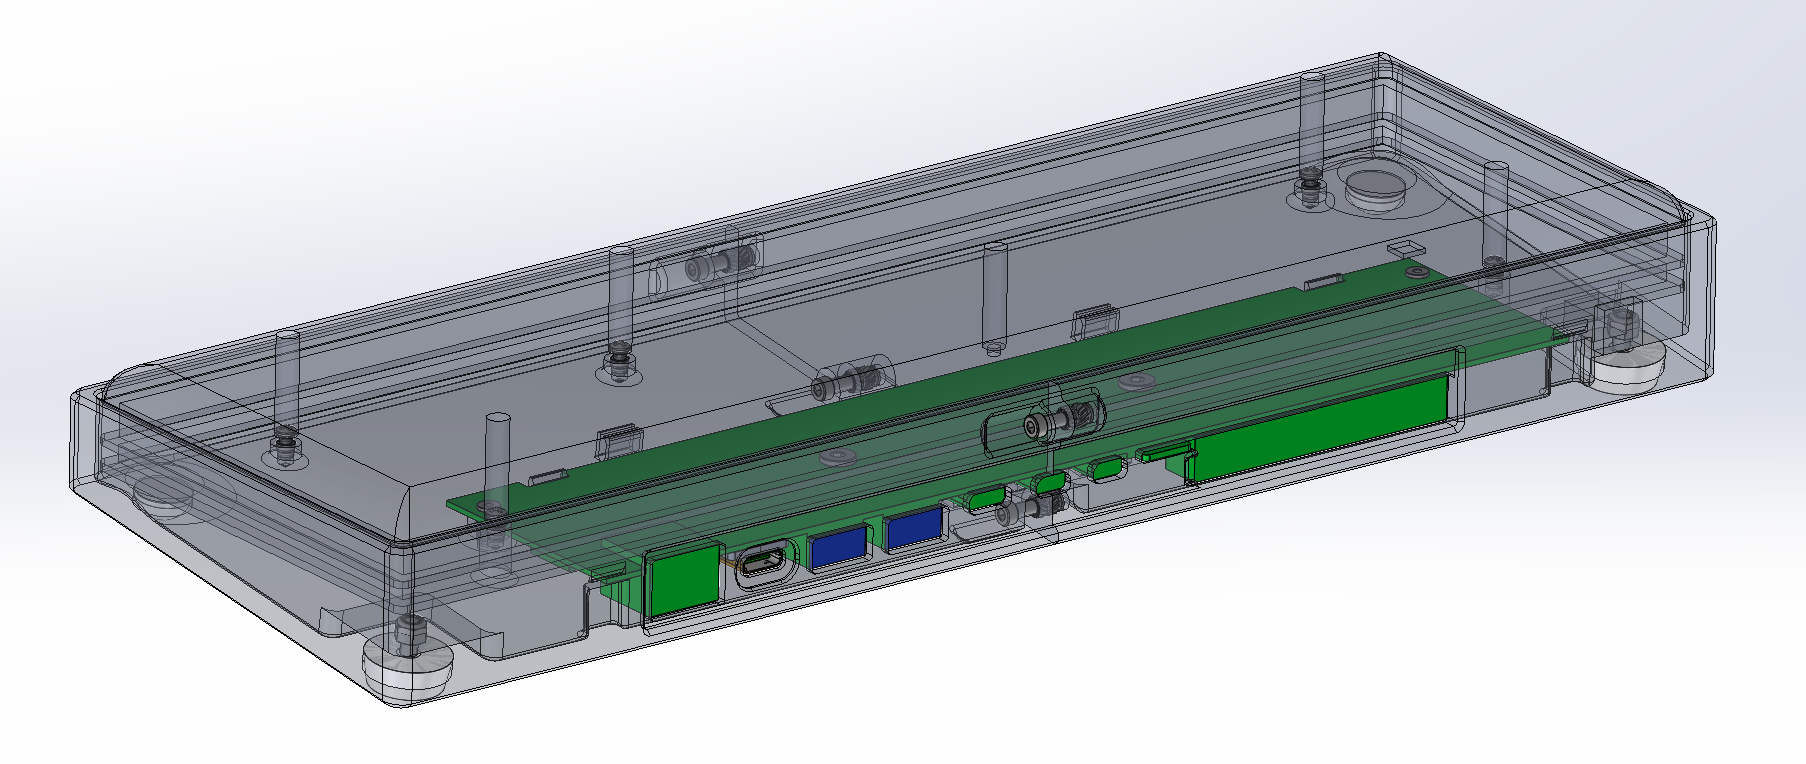
ISO view of the RPi 468 mechanical design.
For the mechanical design I settled on a two-part case made of 3D printed material. I decided on mechanical fastening of the two halves over adhesive for strength and repairability. I toyed with the idea of a unibody CNC’d aluminum case, but cost and likelihood of wireless signal degradation took me off this path.
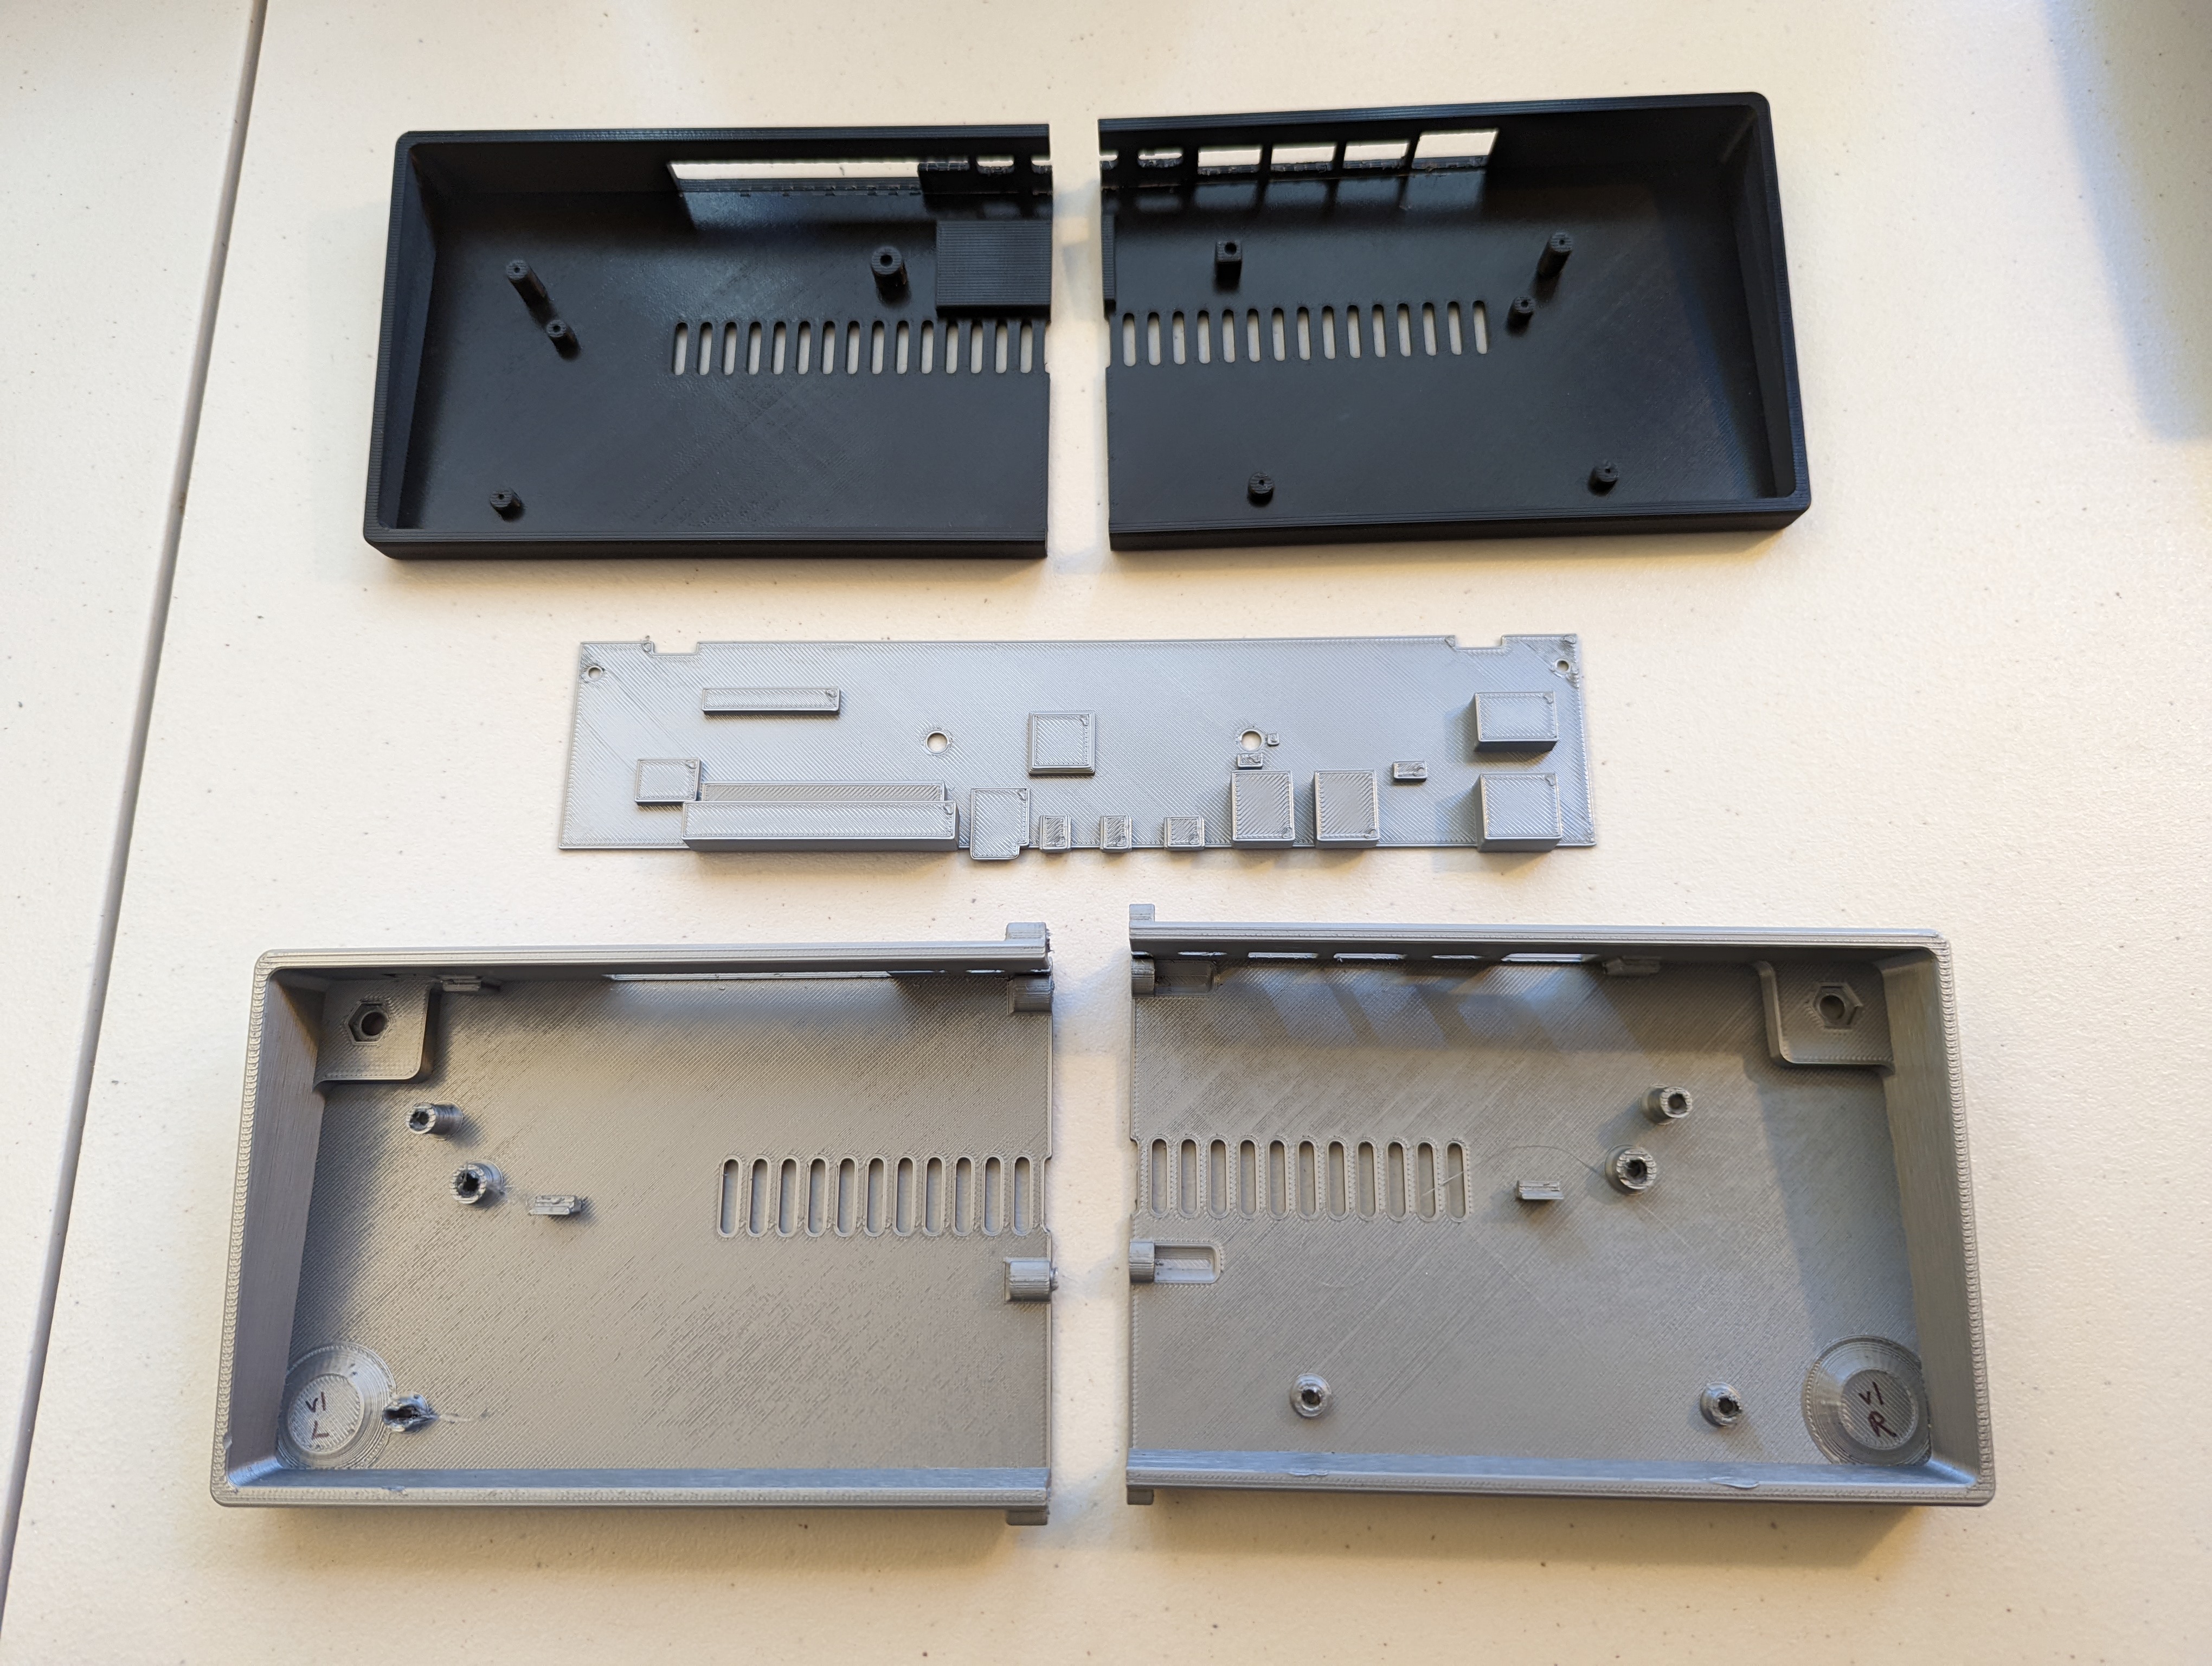
A couple iterations of the case and a Pi 400 mainboard mockup for validating model accuracy.
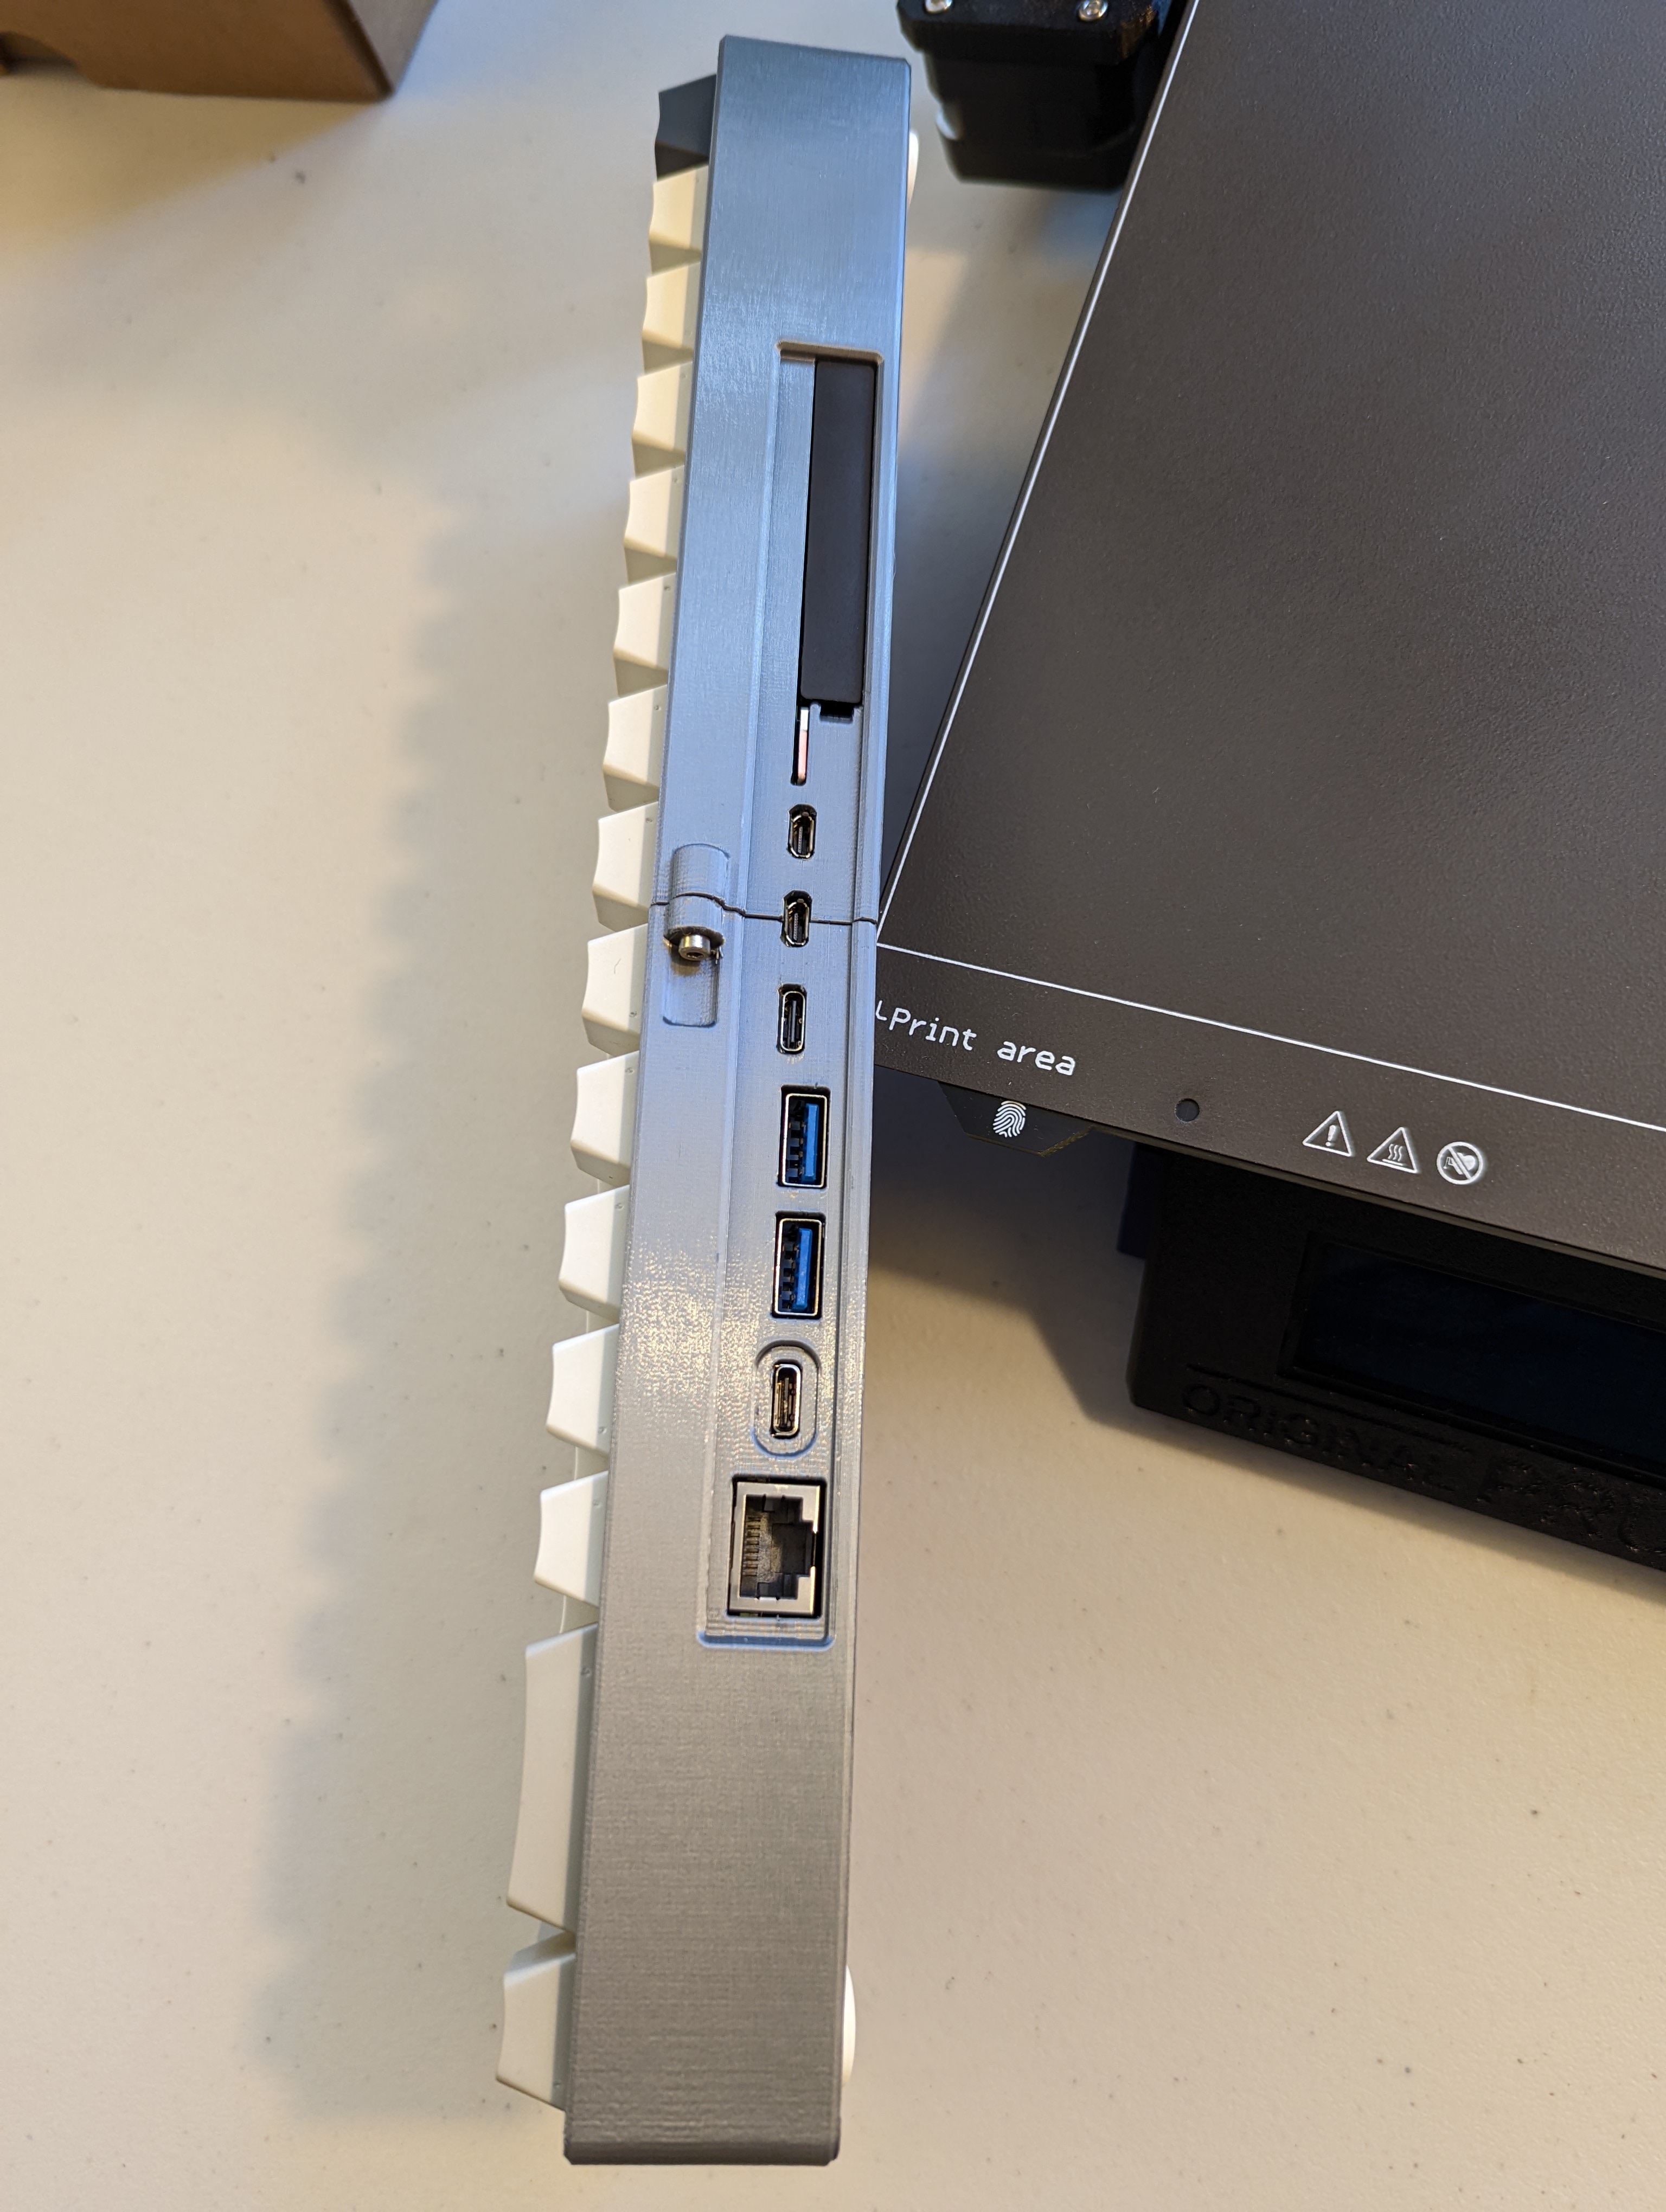
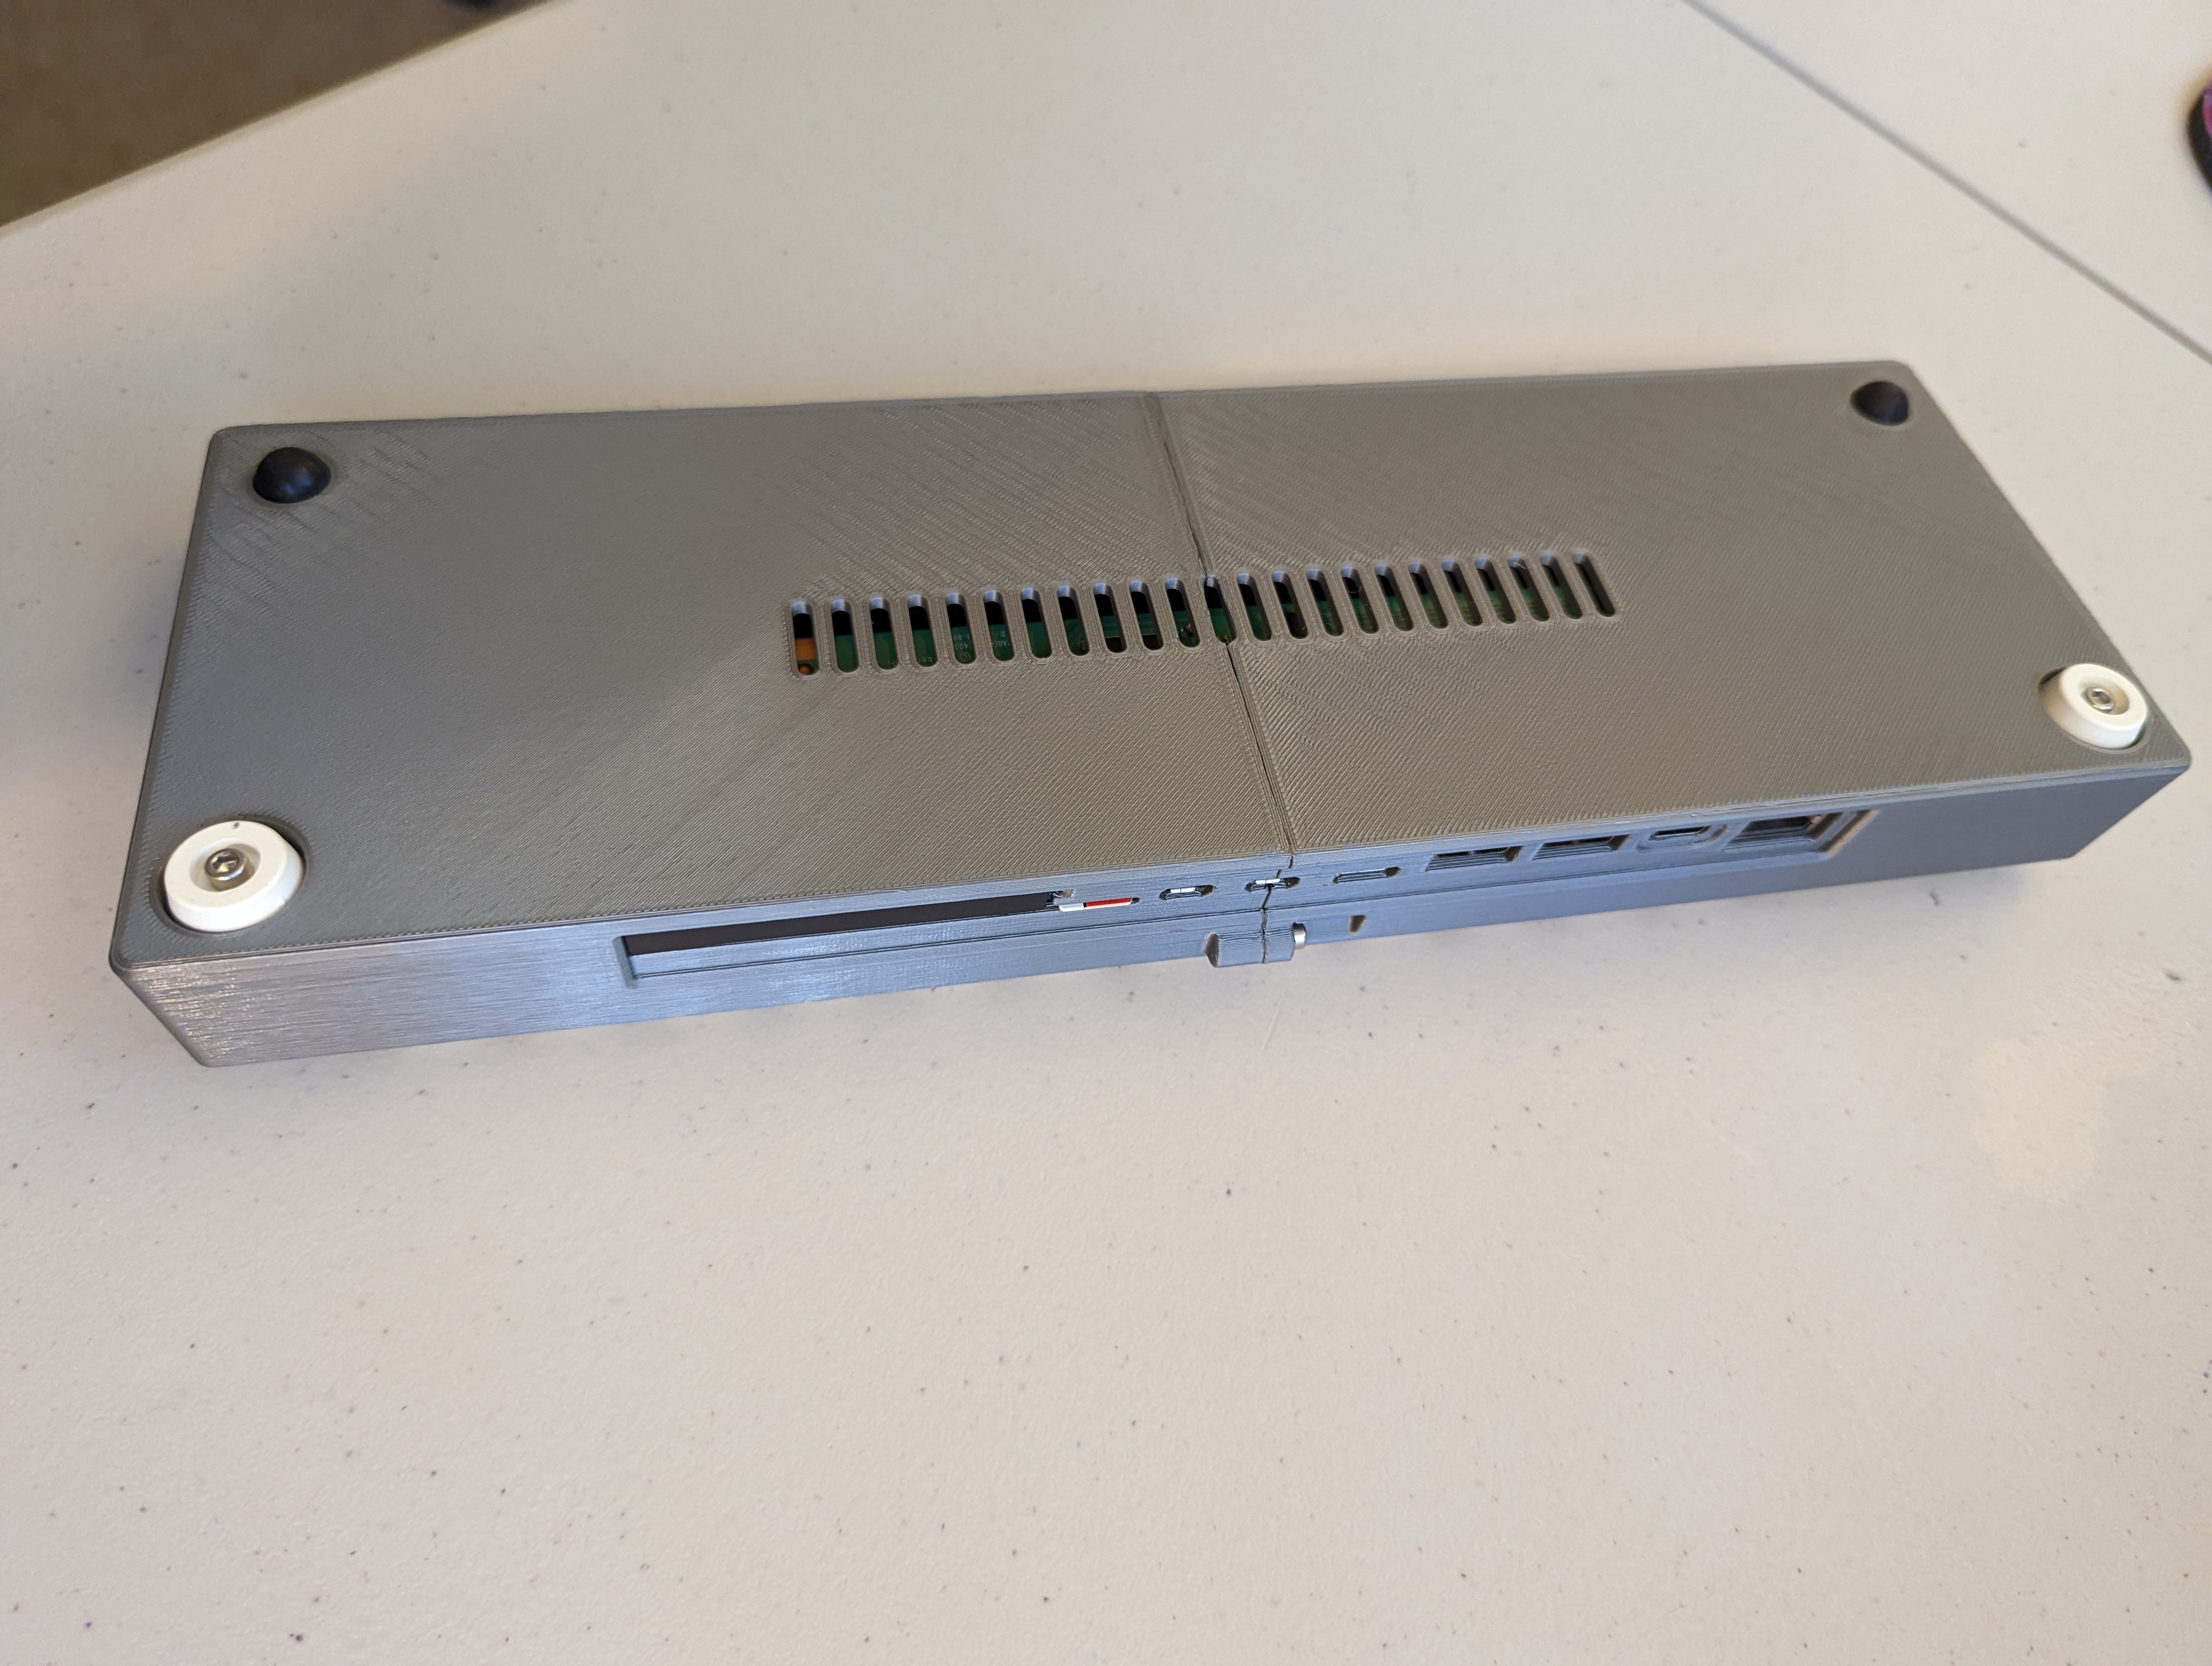
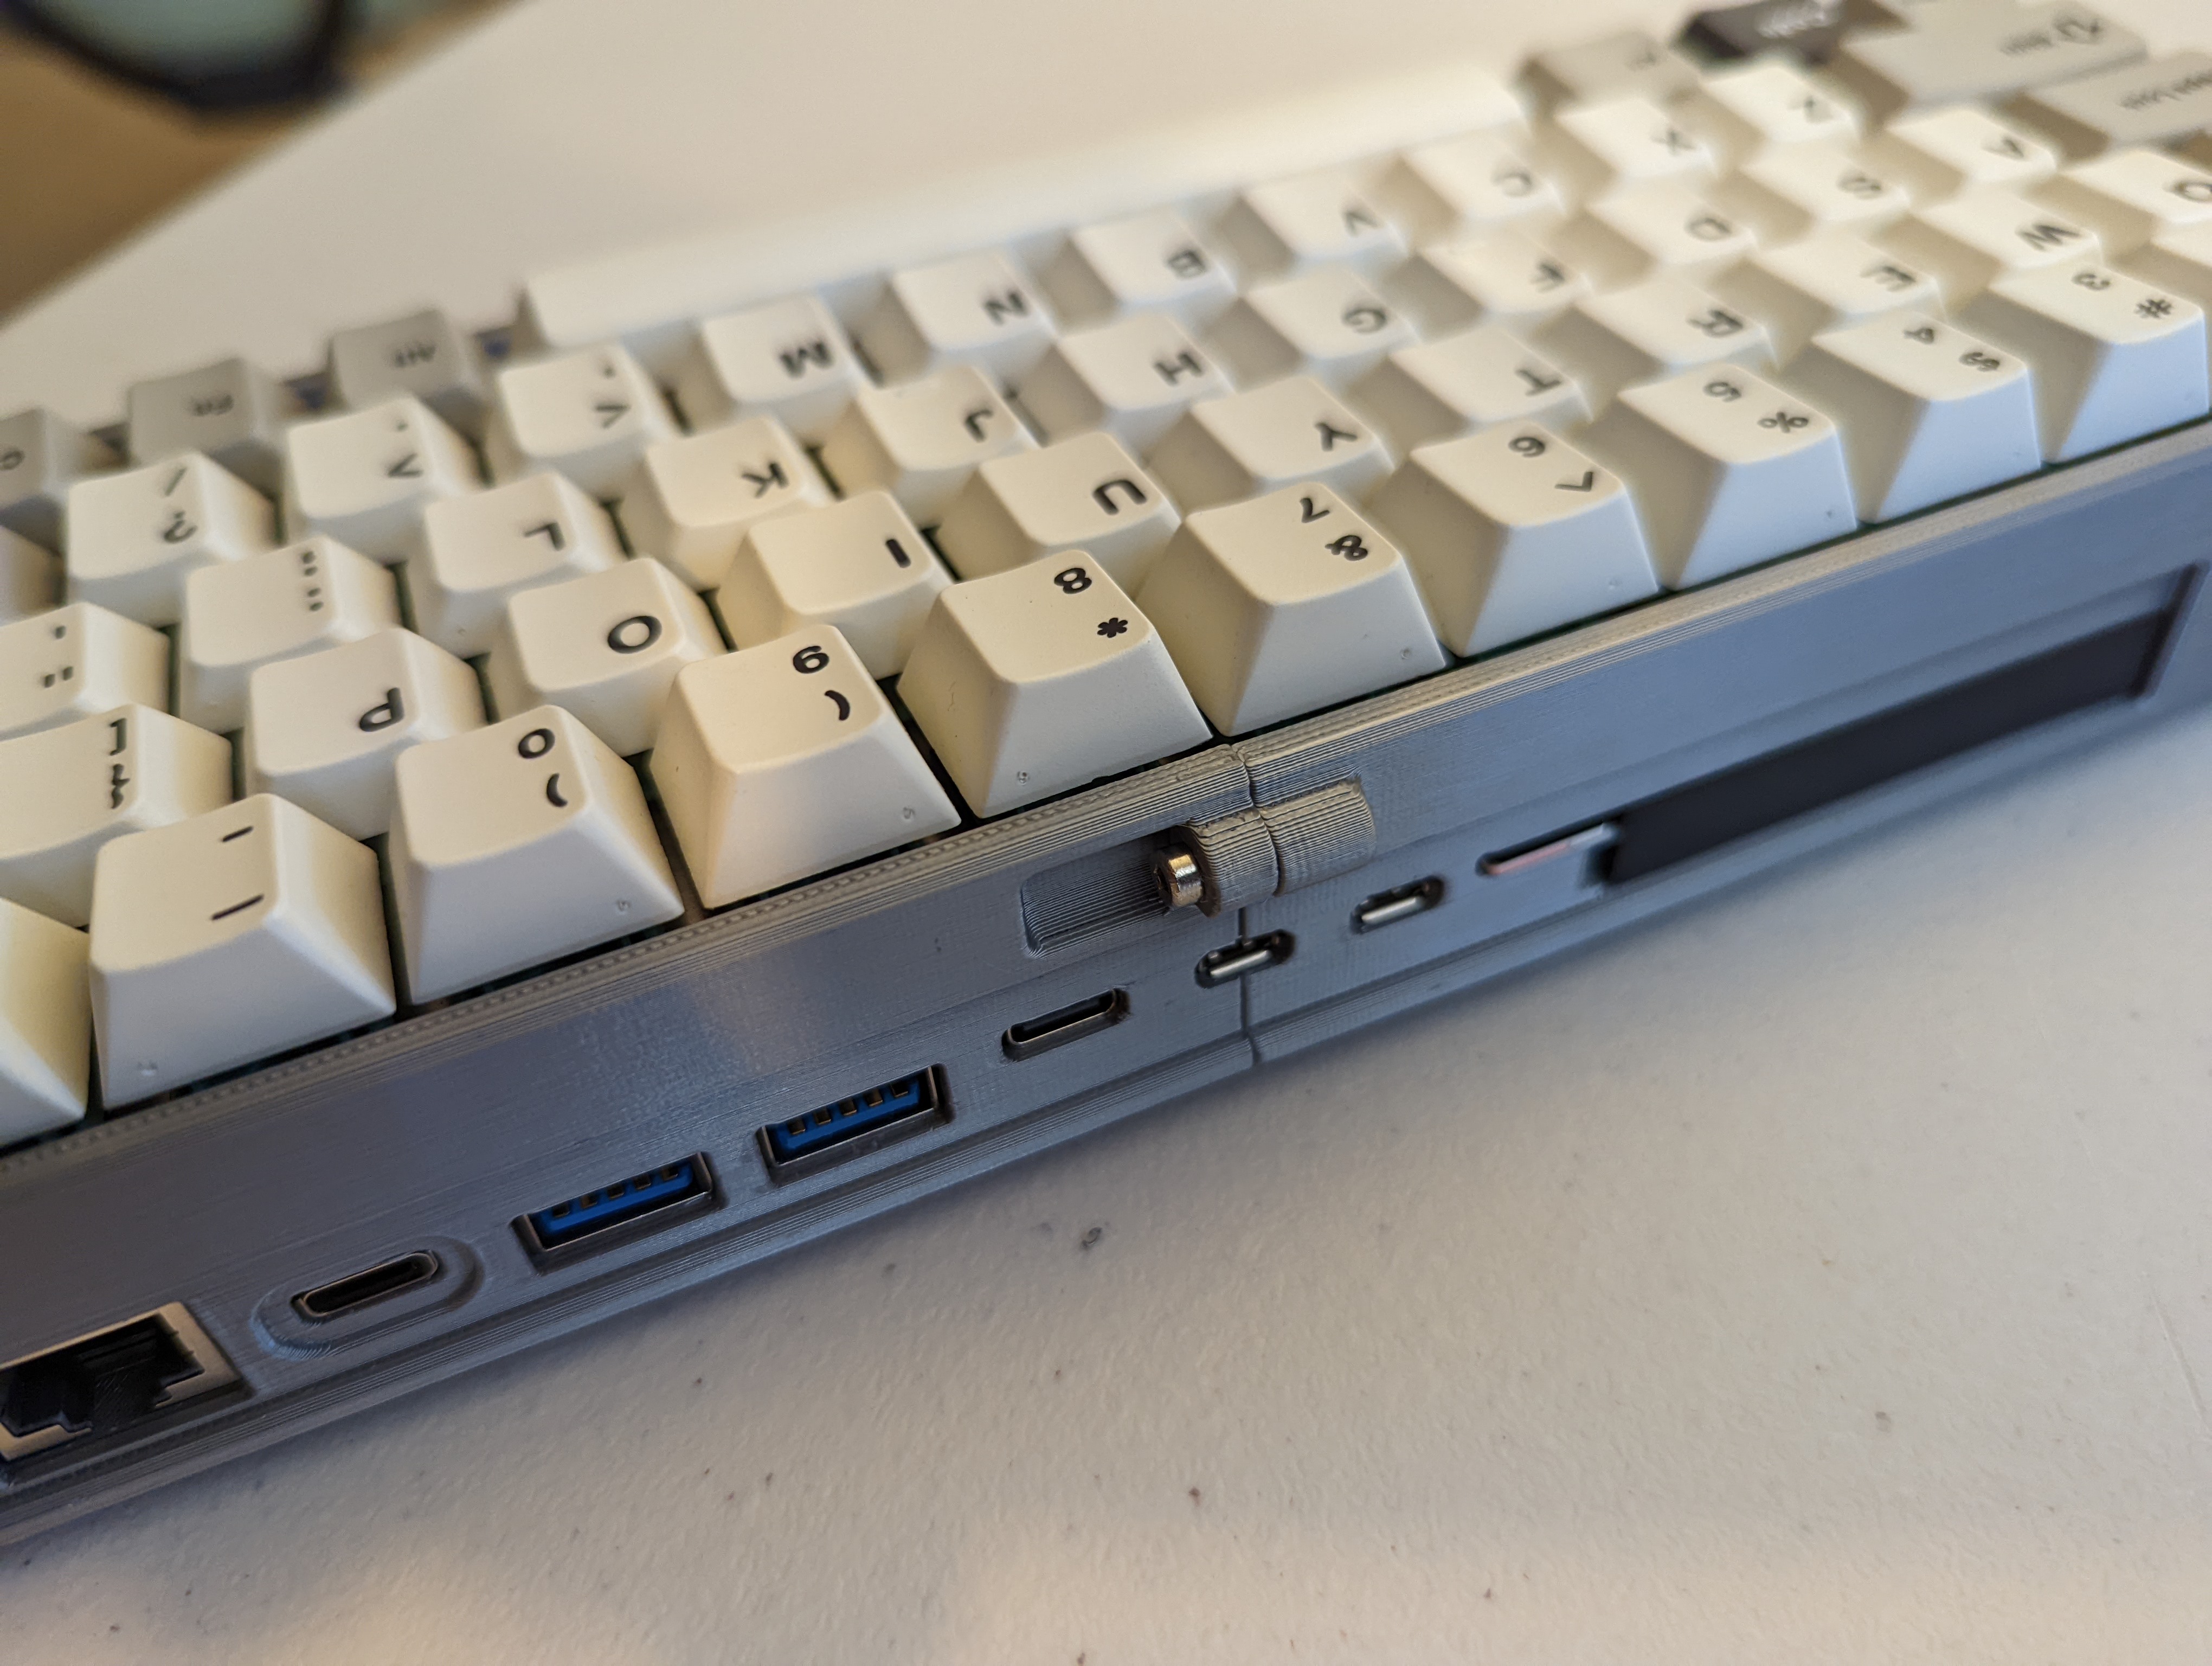
View of front I/O ports after fully assembled.
Design files
Since the build process was rife with trial and error that I didn’t document thoroughly, I won’t write up any documentation for people to try following. For those familiar with SMD soldering and 3D printing though, the images in the gallery and these github repos should provide direction. One caveat: the case model files are for the updated version of the case that has a cutout for a heat sink. Aside from this it’s basically the same case shown in this post.
I used KiCAD for the USB switching circuit PCB design and SolidWorks for mechanical design of the case. PCB and stencil fab was done through OSHPark and OSHStencils. Electrical components were ordered off DigiKey and mechanical parts from McMaster.
For surface mount device (SMD) soldering, I tried a reflow oven but had poor results. I found more success using a combination of hot plate from the bottom and hot air from the top simultaneously.
Links to files:
- Model files for case (STLs): https://github.com/pvphan/rpi468-cad
- PCB design files (KiCAD): https://github.com/pvphan/rpi468-pcb
Final result
Overall I’m quite happy with the result. I use it most as a regular keyboard, especially when I travel. Since my work spaces at the office and at home have their own dedicated keyboard, this one usually stays in my backpack as a fully-loaded Linux PC backup.
In my latest iteration (which I won’t document here), I designed a passive heatsink and modified the case to accept it. I also changed the material to PETG instead of PLA for improved durability and heat tolerance.
Thanks for reading!